How to Install Git Browser on Kodi
>
In this guide, I will show you how to install Git Browser on Kodi 18.5 and lower versions. The method demonstrated works on all Kodi supported platforms, which include, but not limited to, Amazon FireStick, Windows PC, Mac, Android Smartphones and more.
GitHub is the most widely used version control hosting service and free software distribution platform. It hosts hundreds of thousands of codes and software programs from software development companies and independent developers. GitHub is also one of the most popular hosts to Kodi addon repositories.
One way to install repositories on Kodi is to point Kodi to the GitHub server with the corresponding URL of the repositories. The other way is to get the Git Browser and download the repositories directly from the source. Installing the repositories directly makes things somewhat easy. In this tutorial, you will learn to install Git Browser from the Indigo Kodi addon. I will also show you how to get started with it.
How to Install Git Browser on Kodi
Git Browser is the part of Indigo addon. To install Indigo Kodi addon, we must first tweak the following security setting:
- Run Kodi and then from the home-screen click Settings
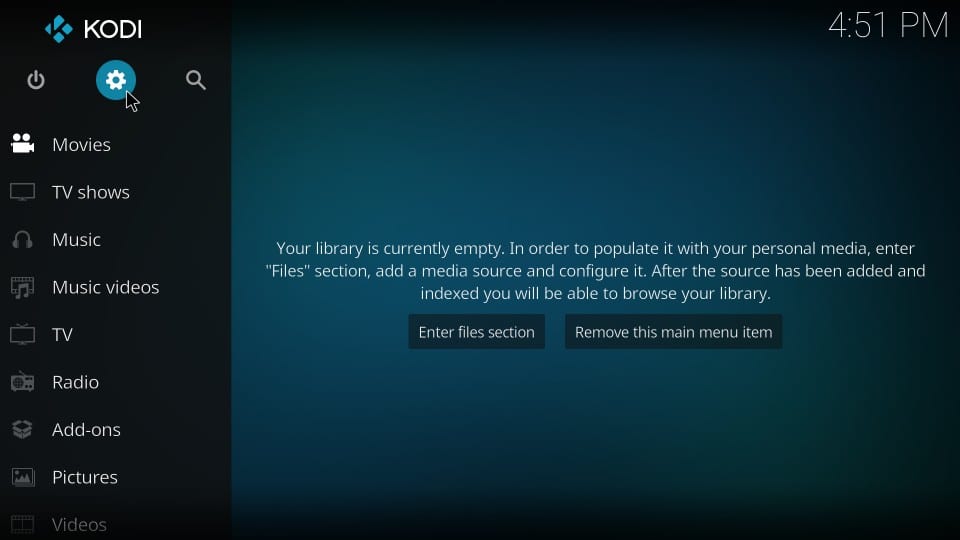
- Go to System Settings (click System if you have Kodi 18 Leia)
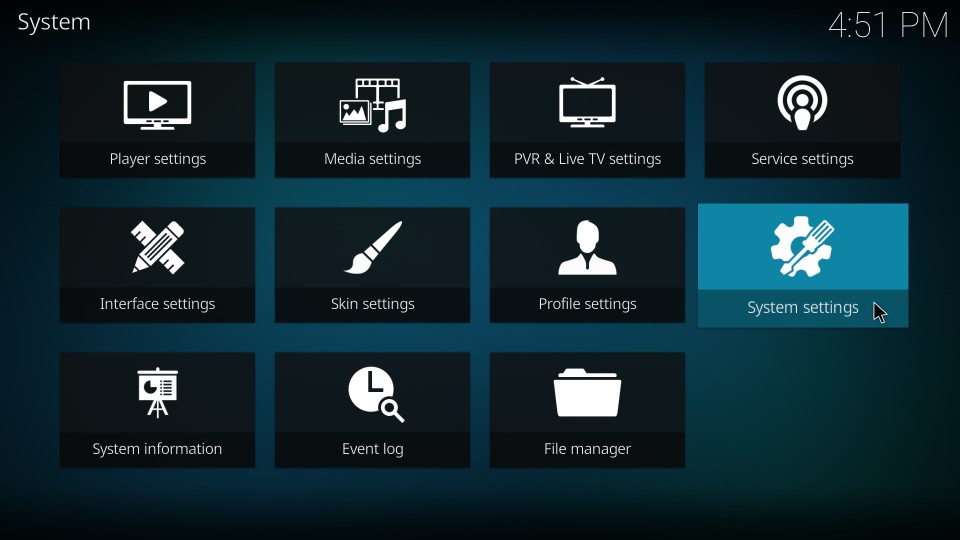
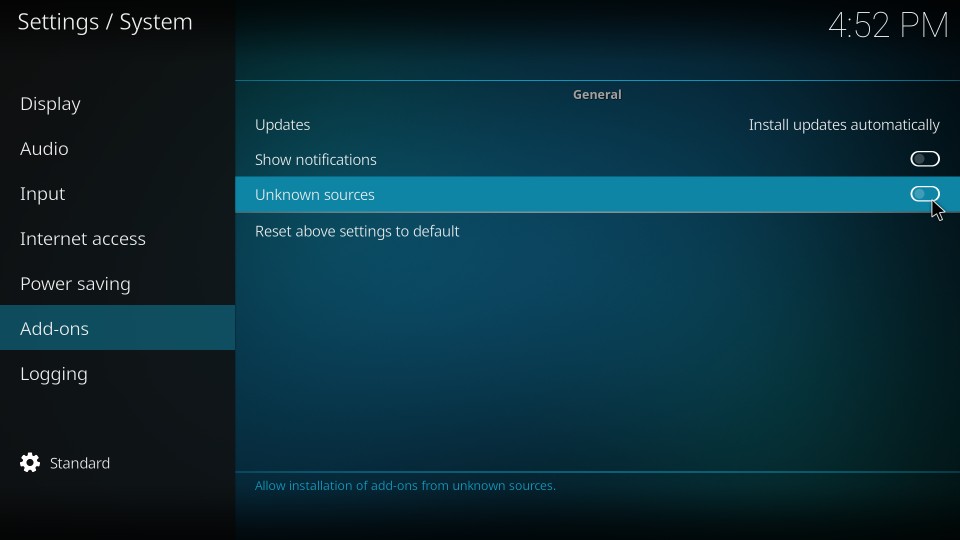
- Select Add-ons on the left of the screen
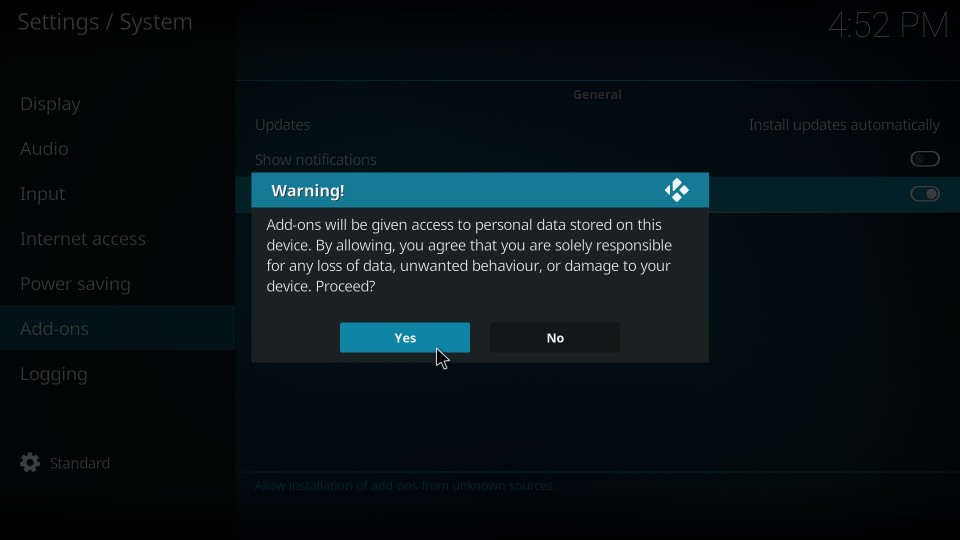
- Go to the right of the screen and switch on the option Unknown Sources
- Click Yes when prompted
Method 1: Install Git Browser Directly from the TVAddons Repository
We will first install the TVAddons Repository and later use this repository to install the Git Browser on FireStick. Follow these steps:
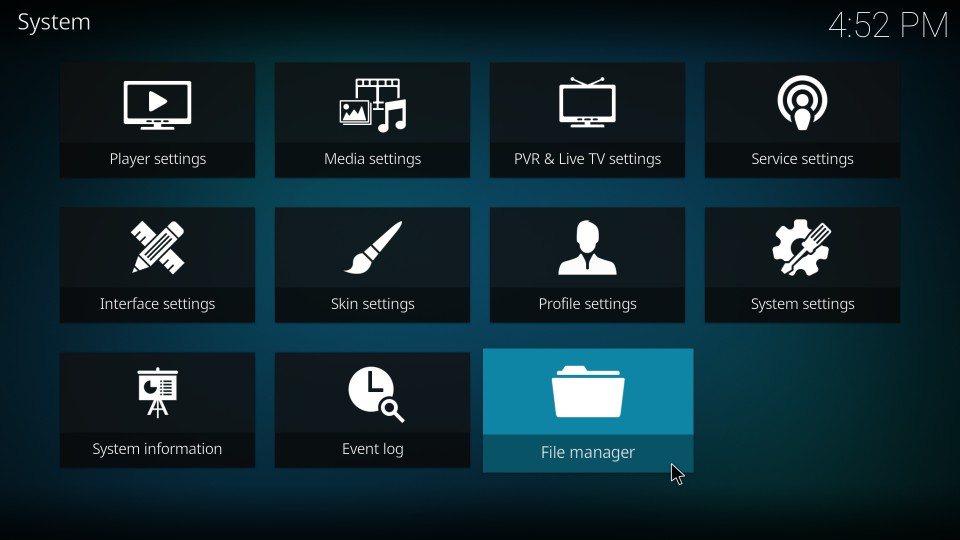
- Click Settings on the Kodi home-screen

- Open File manager
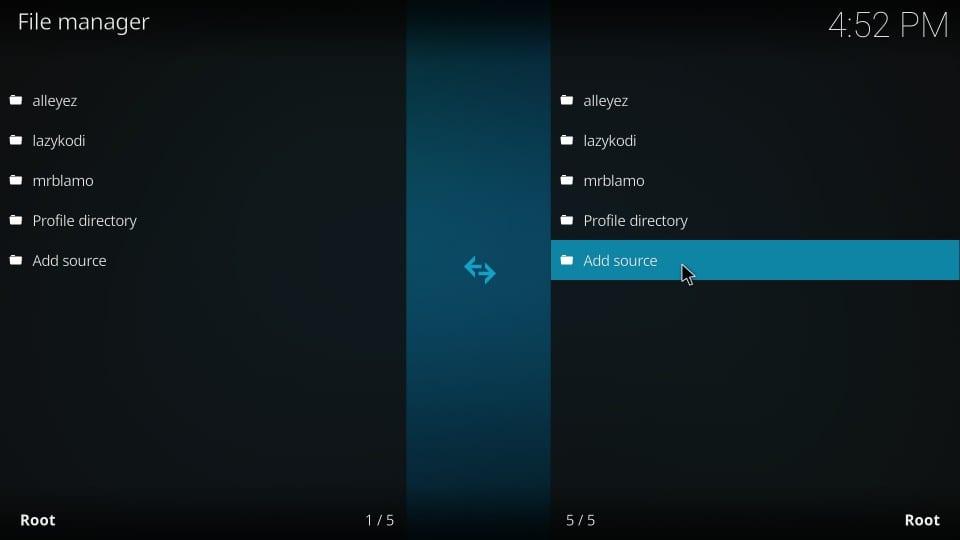
- Click Add source
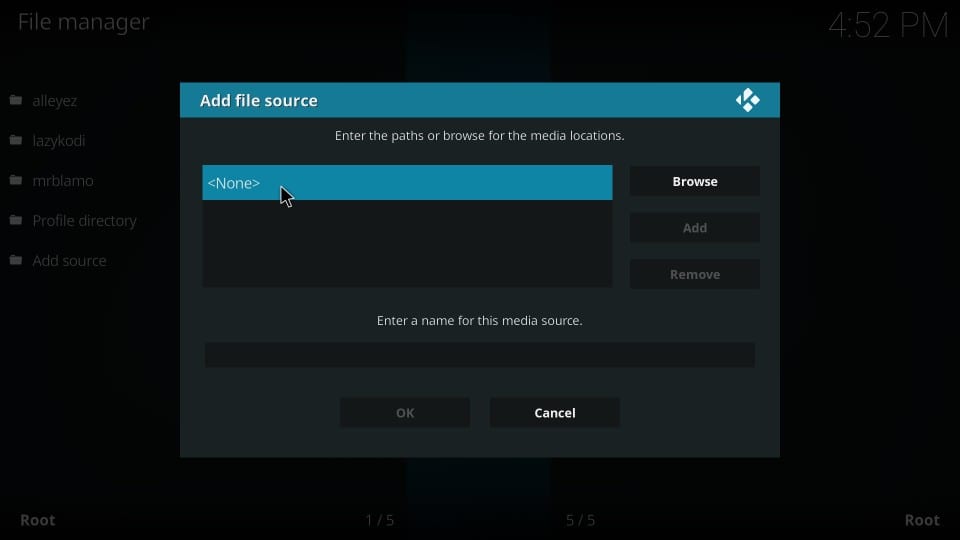
- Click where it says
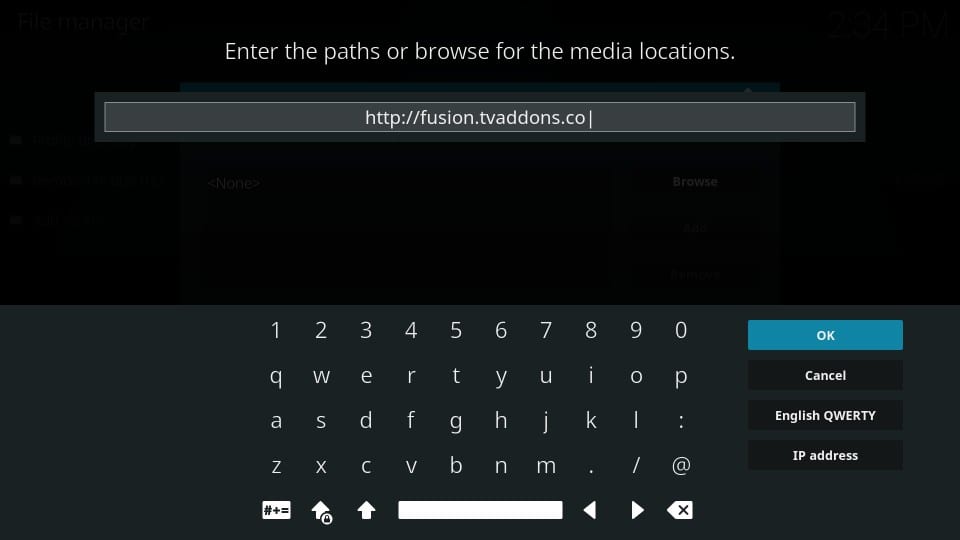
- Type in the following URL exactly as given here: http://fusion.tvaddons.co
Click OK
- Highlight Enter a name for this media source and type in any name you want to give to the source you added.
Let’s go with fusion. Click OK
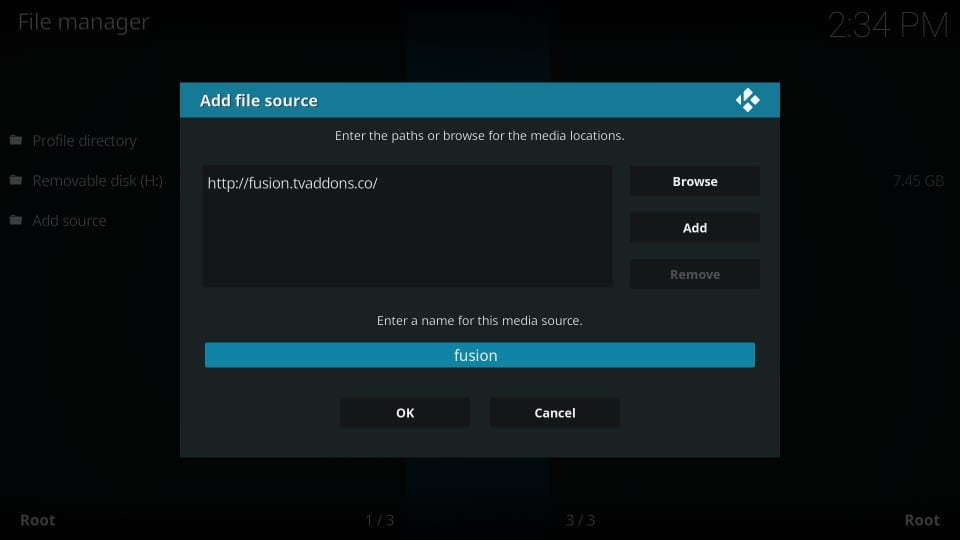
- Go back to Kodi home-screen
- Click Add-ons
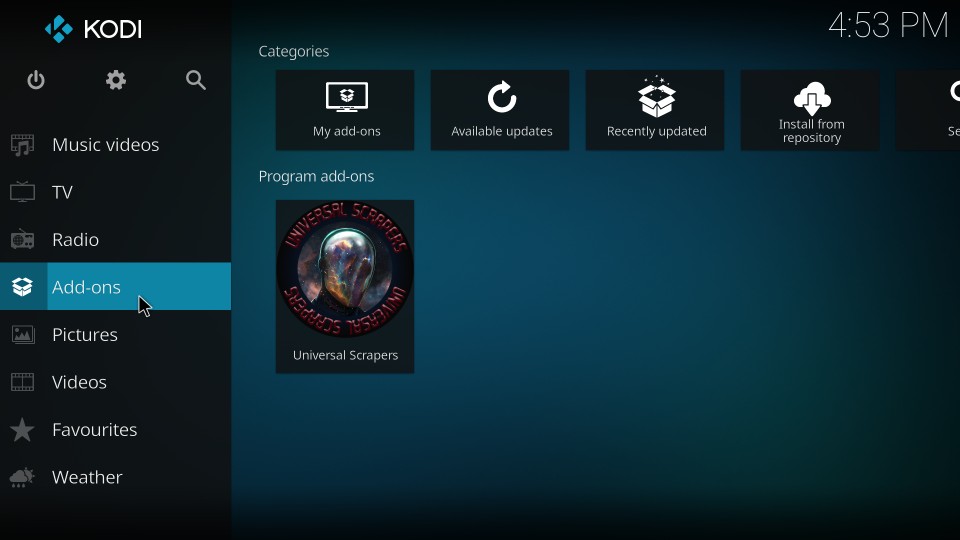
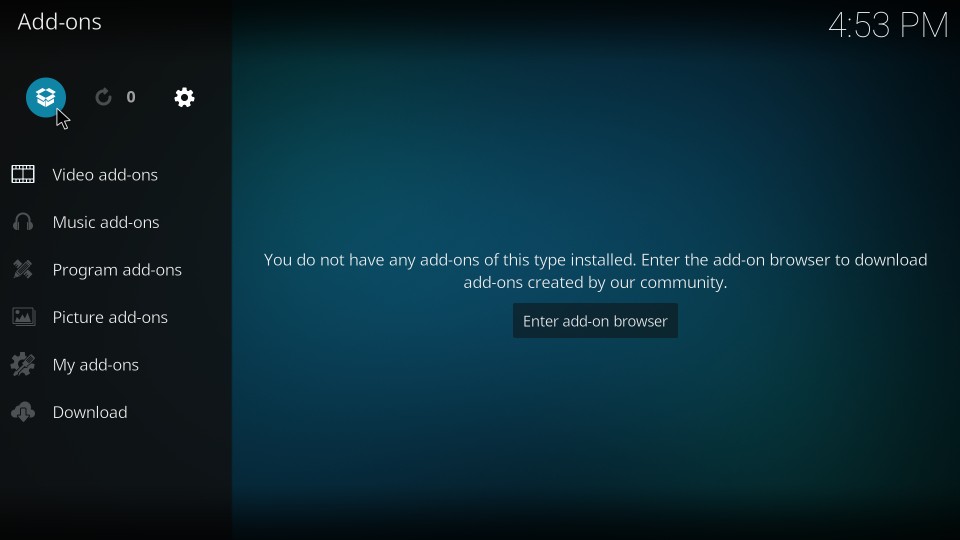
- Select the open-box icon in the upper-left corner of the next screen (also called Package installer)
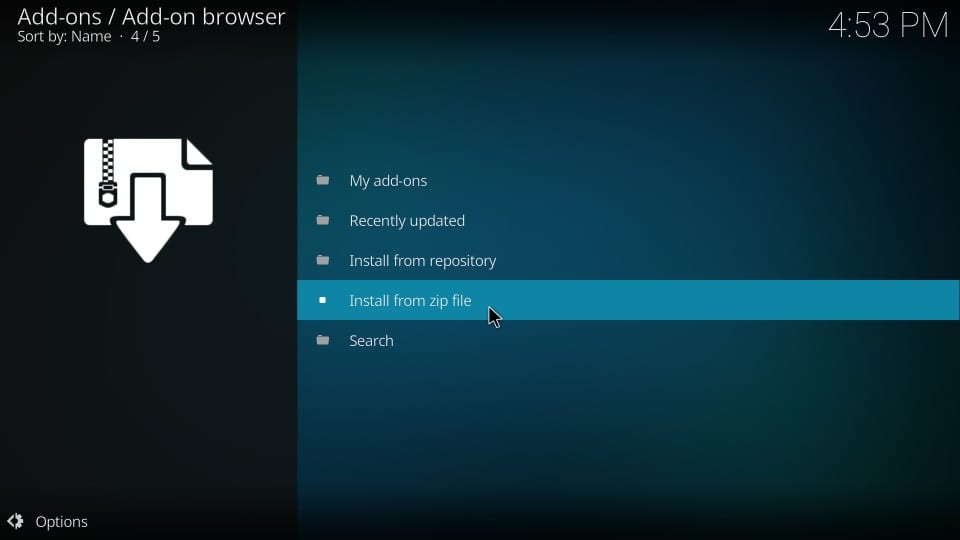
- Click Install from zip file
- Click the source name fusion (or whatever you named the source earlier)
Note: You will also follow the steps 1 to 11 here in Method 2 below
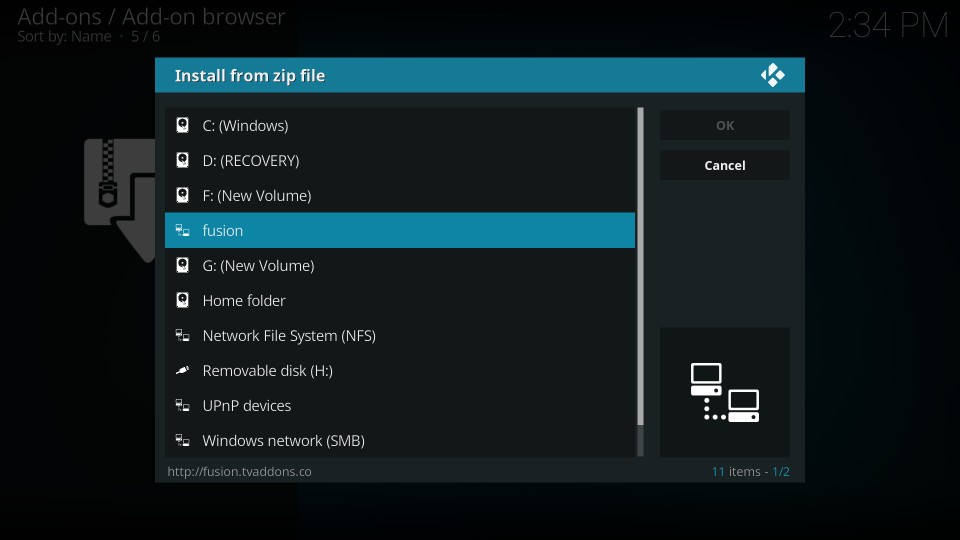
- Click kodi-repos
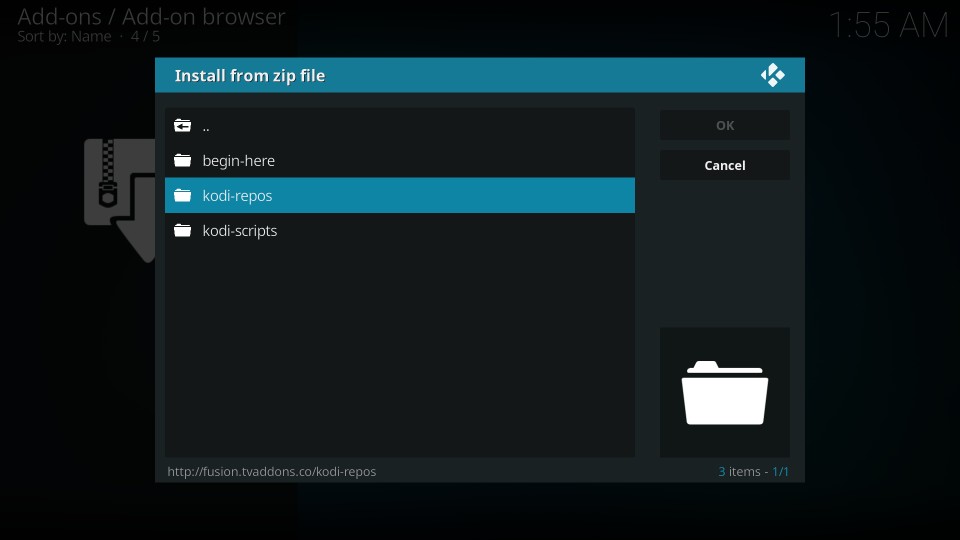
- Open the folder english next
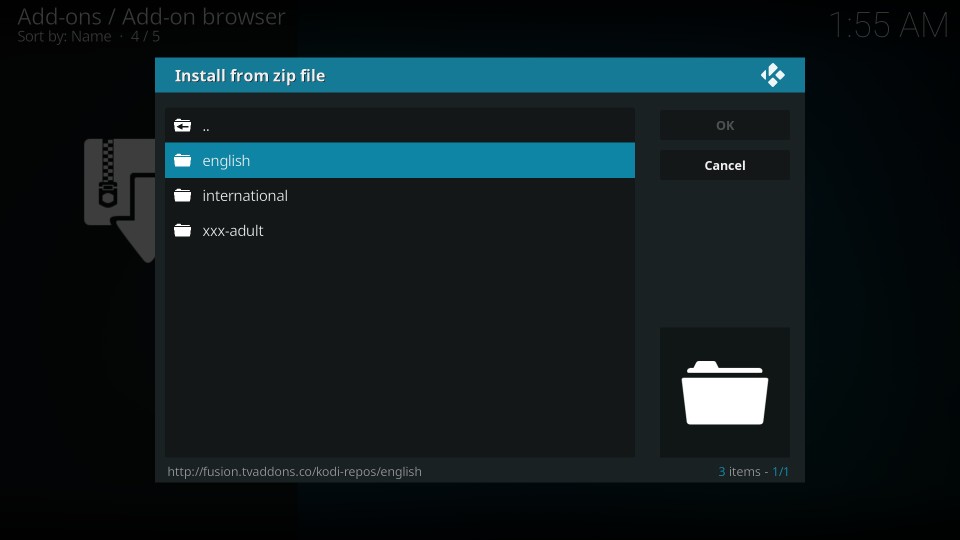
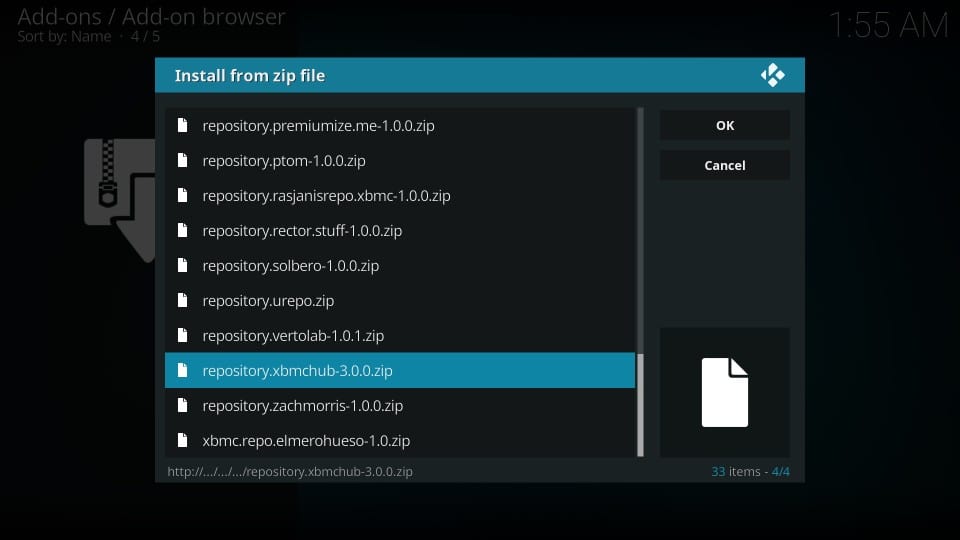
- Click repository.xbmchub-3.0.0.zip on the following screen. You will need to scroll down to somewhere around the bottom to spot this zip file.
Note: Click this zip file even if it has a different version number
- Wait for he TVAddons.co Add-on Repository Add-on installed notification to appear (near the top-right corner of the screen)
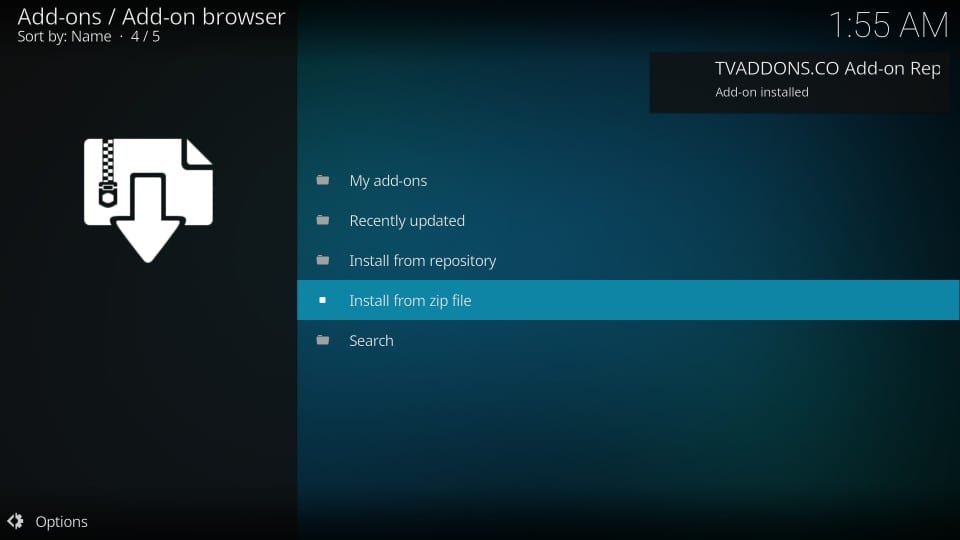
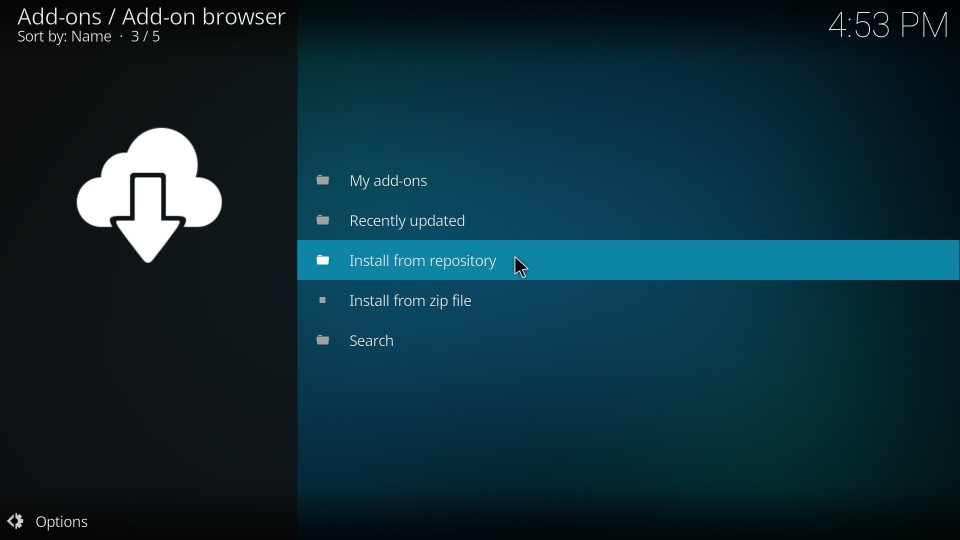
- Click Install from repository
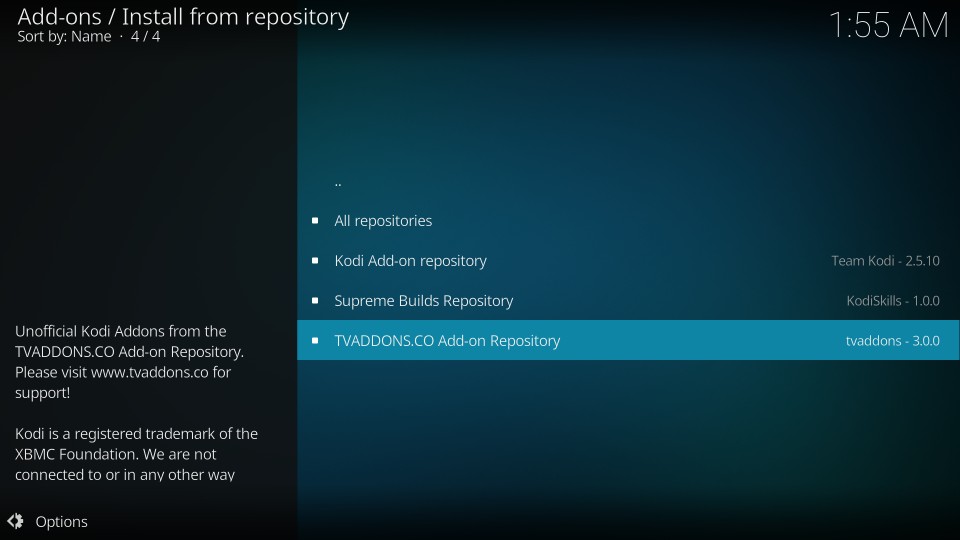
- Click TVADDONS.co Add-on Repository
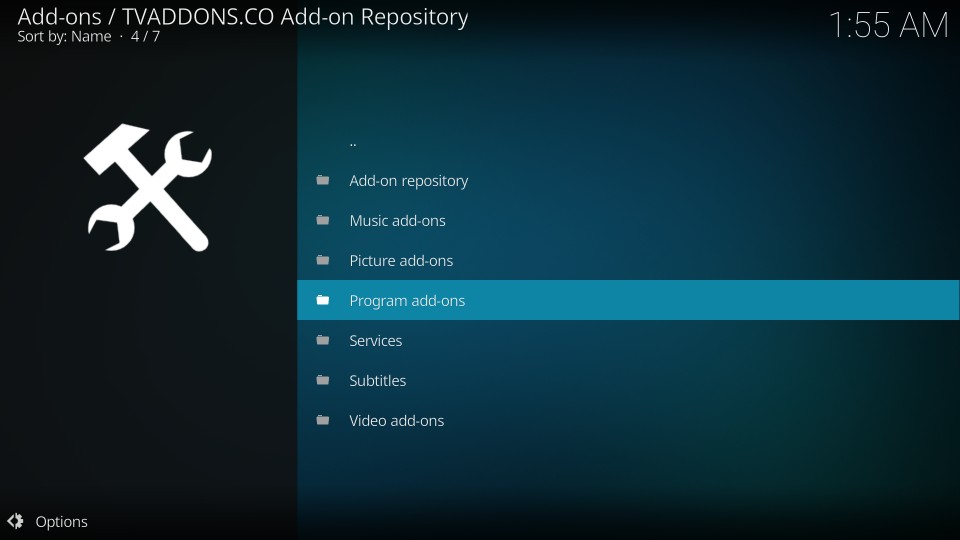
- Open the option Program add-ons
- Select and click Git Browser on the next window
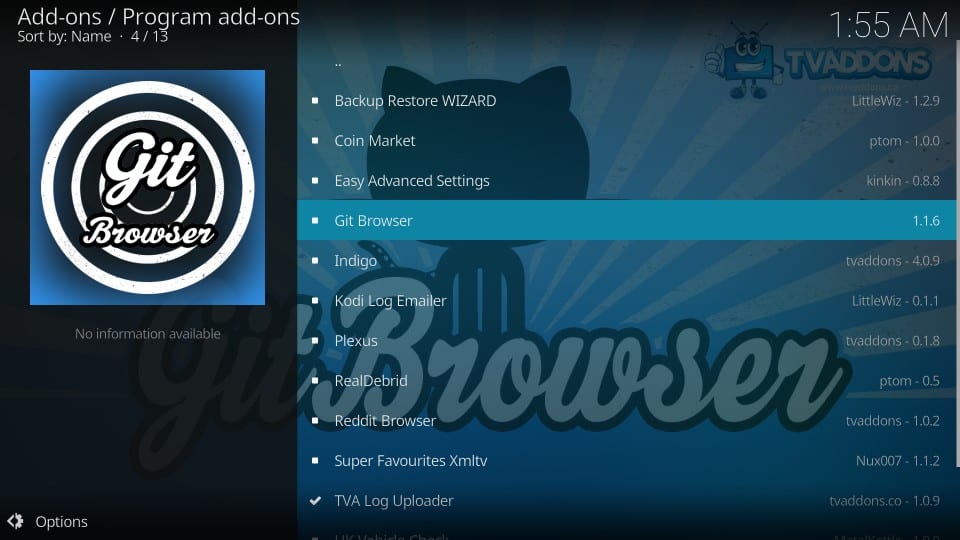
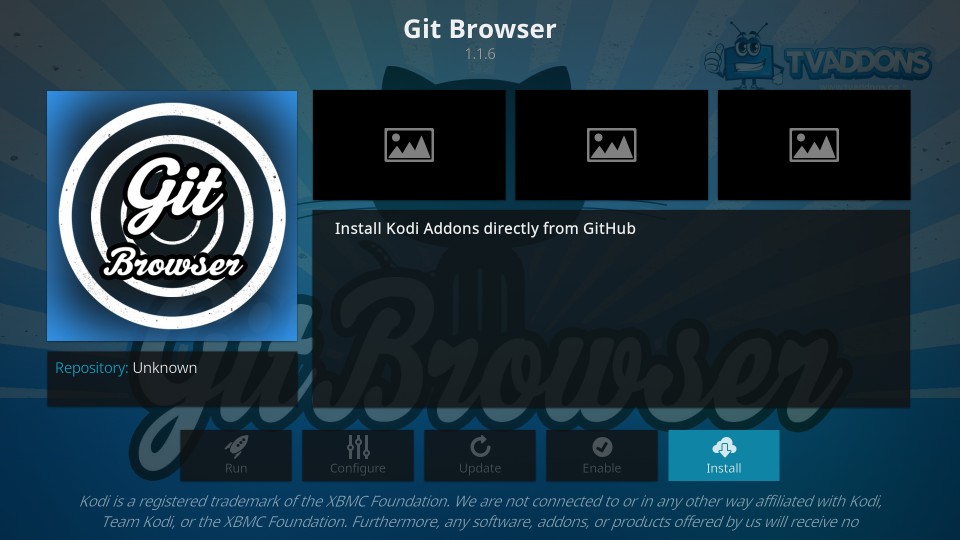
- Click Install on the lower-right of the window (click OK if you see an additional popup on Kodi 18)
- Wait until you see the Git Browser Add-on installed notification (again on the top-right)
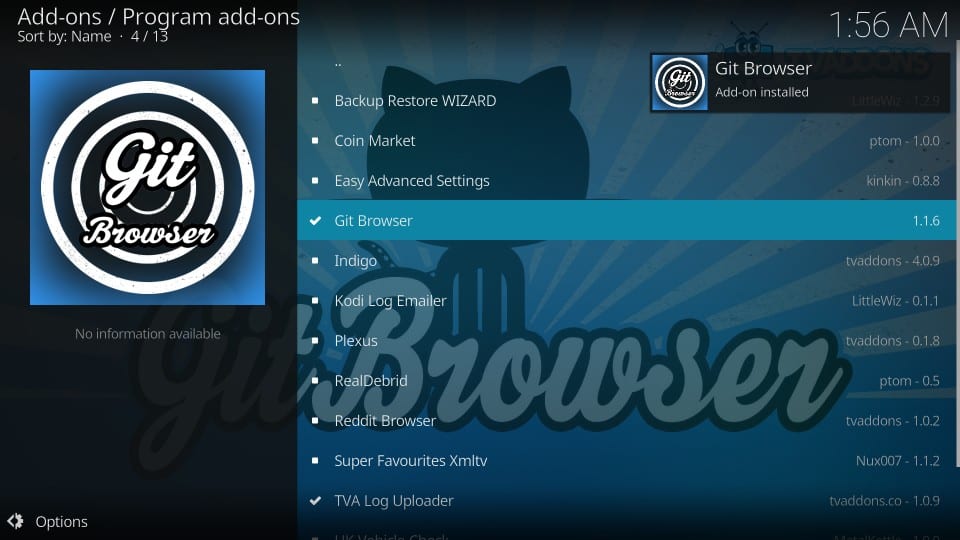
You have successfully installed the Git Browser addon on Kodi from the TVAddons Repository.
Attention KODI Users: Read before you continue
Kodi Addons / builds offer unlimited streaming content, but could also get you into legal trouble if caught streaming free Movies / TV shows / Sports. Kodi users are strongly advised to always connect a VPN while streaming online. A good Kodi VPN hides your identity, bypasses government surveillance, geo-blocked content, and ISP throttling (which also helps in buffer-free streaming).
I use ExpressVPN which is the fastest and most secure VPN. It is very easy to install on any device including Amazon FireStick. You get 3-months free and save 49% on its annual plans. Also, it comes with a 30-day money-back guarantee. If you are not satisfied, you can always ask for a refund.
Click HERE to get 3-months free and save 49% on ExpressVPN
Read: How to install and use a Kodi VPN
Method 2: Install Git Browser Using the Indigo Addon
Follow the steps 1 to 11 in Method 1 above (up to the point where you click source name fusion)
- Open the option begin-here (after clicking fusion in Step 11, Method 1 above)
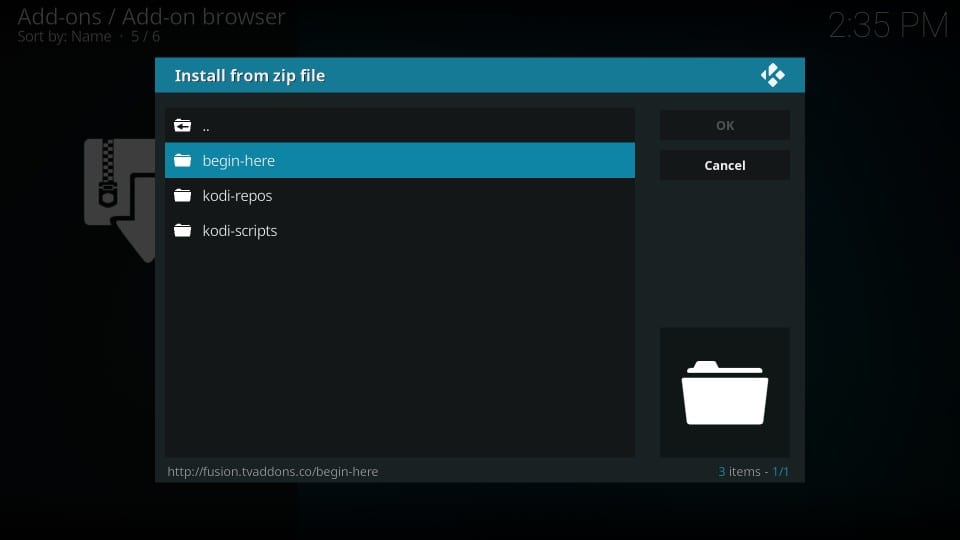
- Click the zip file plugin.program.indigo-x.x.x.zip
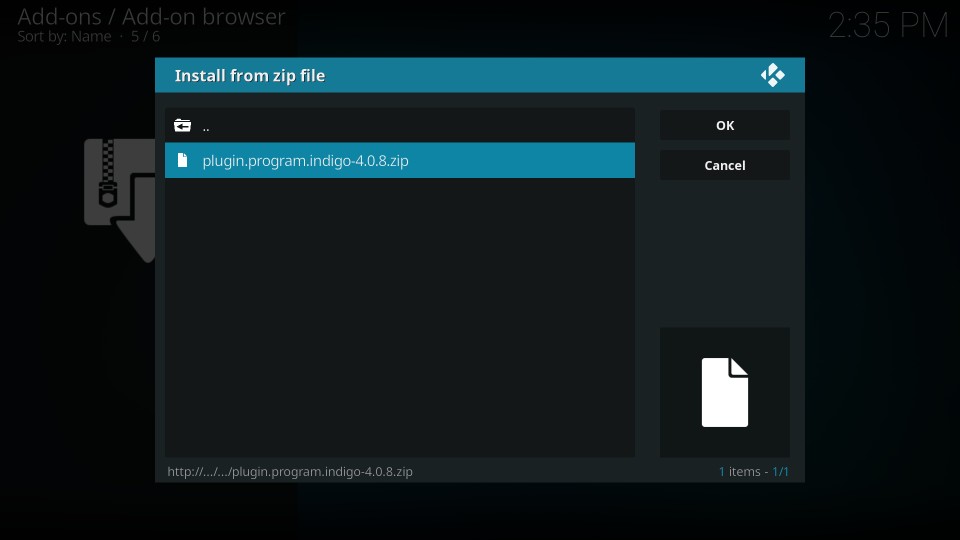
- Wait for the Indigo Add-on installed notification. You will see it on the top-right of the screen
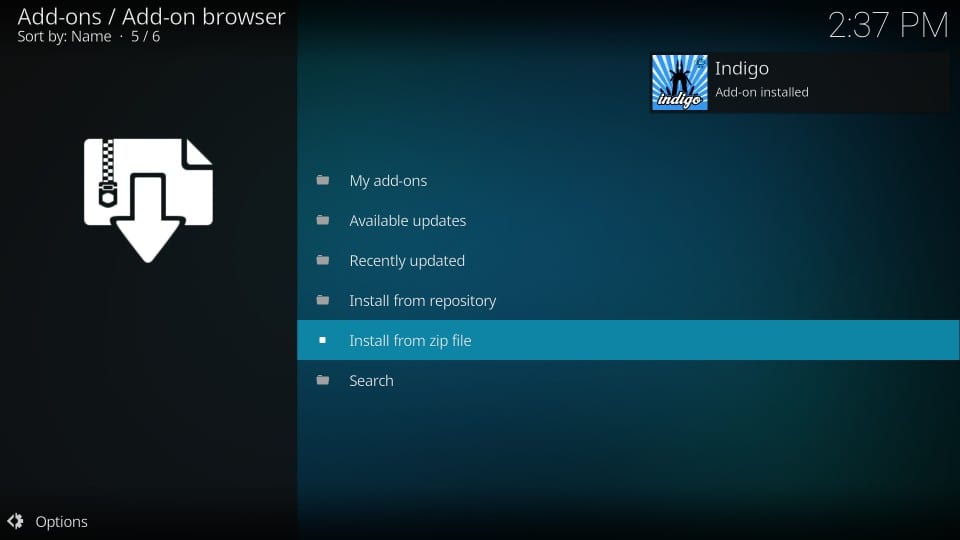
- Go back to the Kodi home-screen again
- Go to Add-ons > Program Add-ons
- Open Indigo Kodi addon
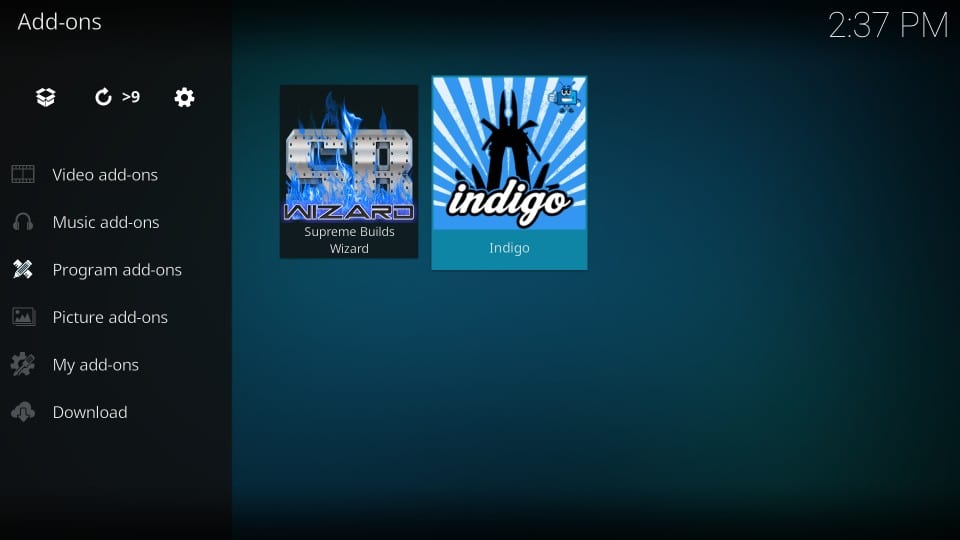
- Open Addon Installer
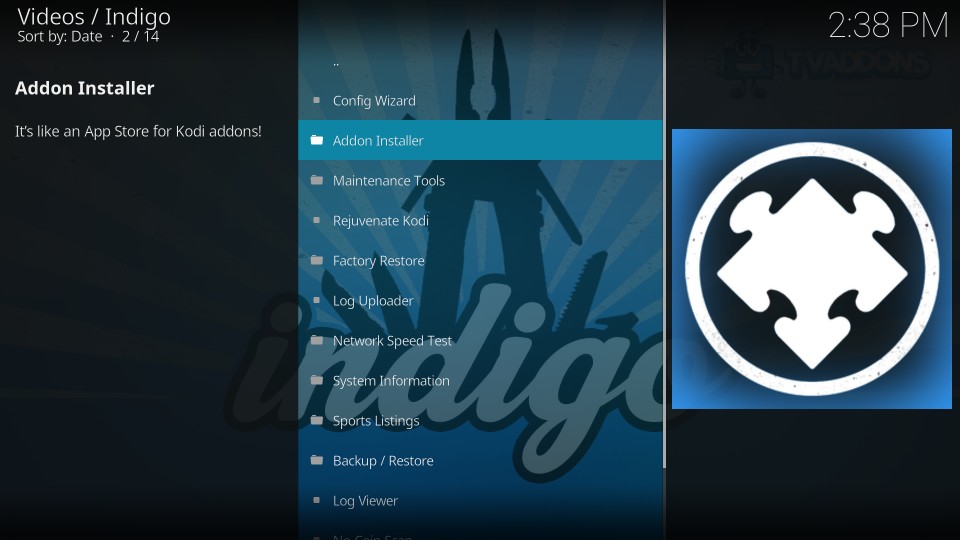
- Click Git Browser
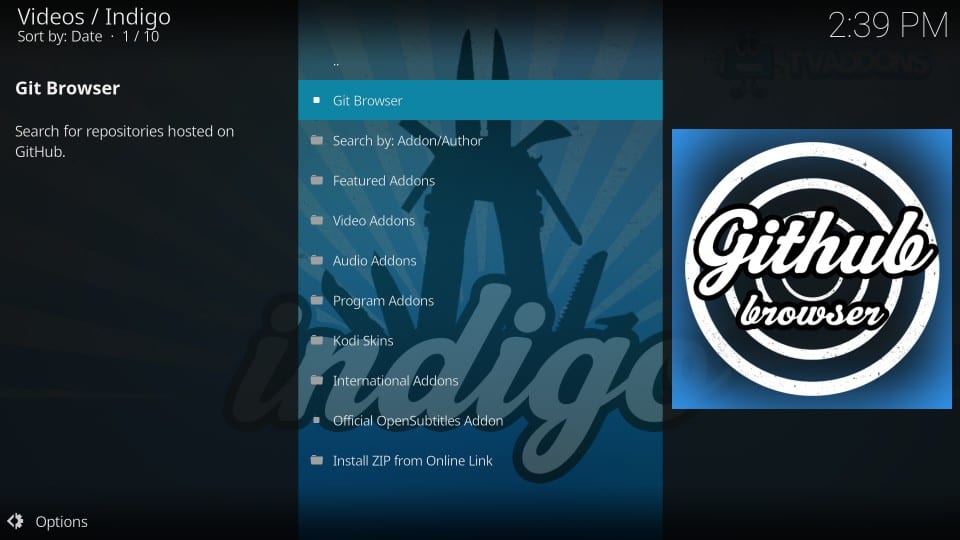
- When prompted, choose Yes
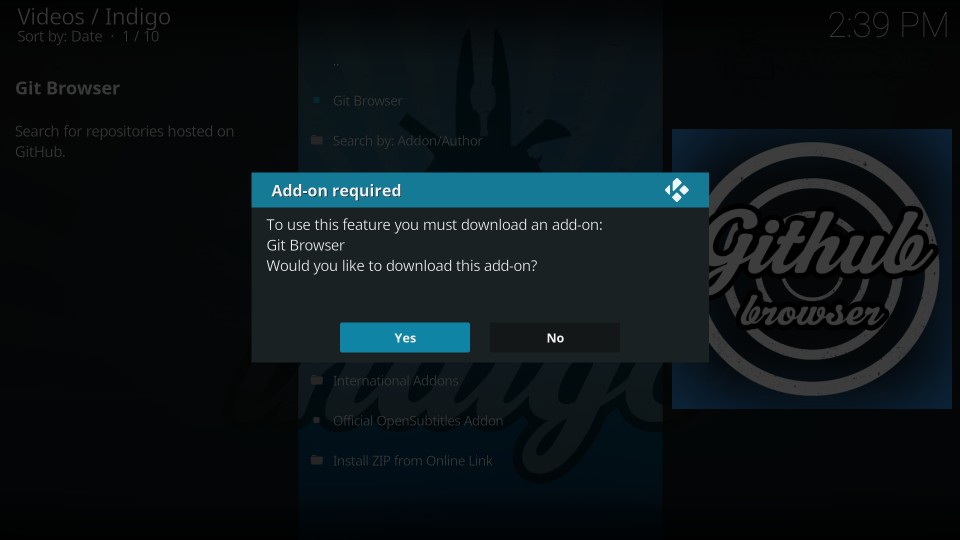
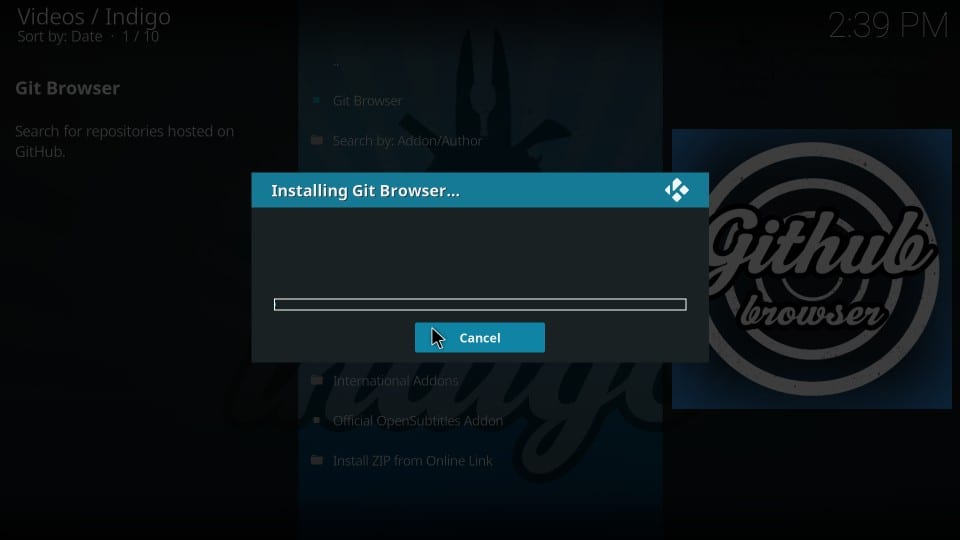
- Wait for Git Browser to install.
- You have successfully installed the Git Browser on Kodi. Let me now quickly show you to use it to install repositories.
How to use Git Browser to Install GitHub Kodi Addons
1. Navigate from the Kodi home-screen, go to Addons > Program Addons and open Indigo addon. Now go to Addon Installer > Git Browser

2. When the following prompt appears, hit the esc key on your keyboard or the OK key on your remote to get rid of it
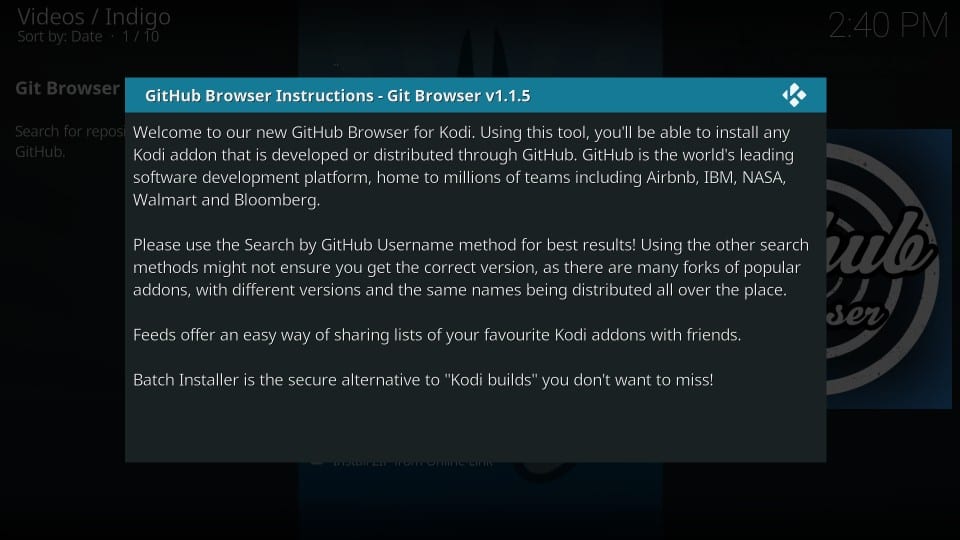
3. Choose Search by GitHub Username
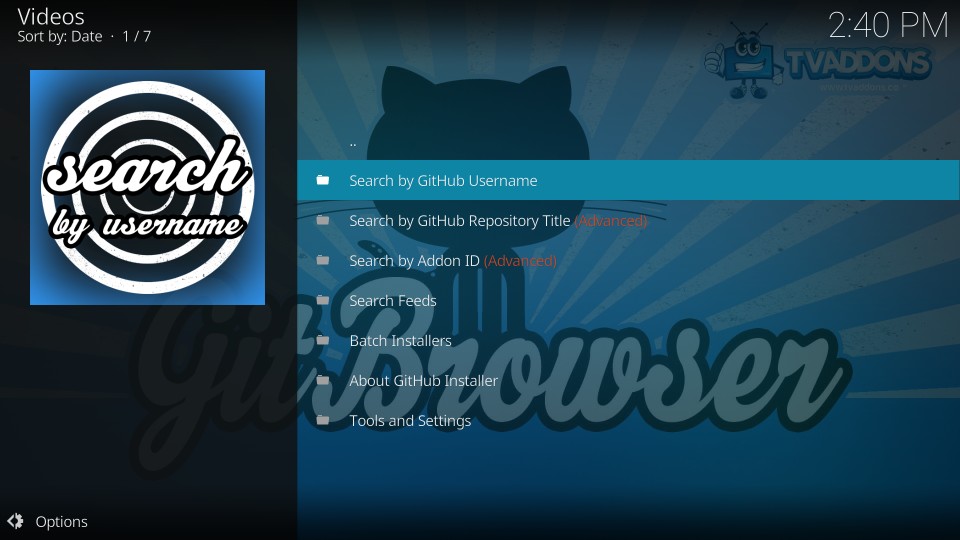
4. Click New Search
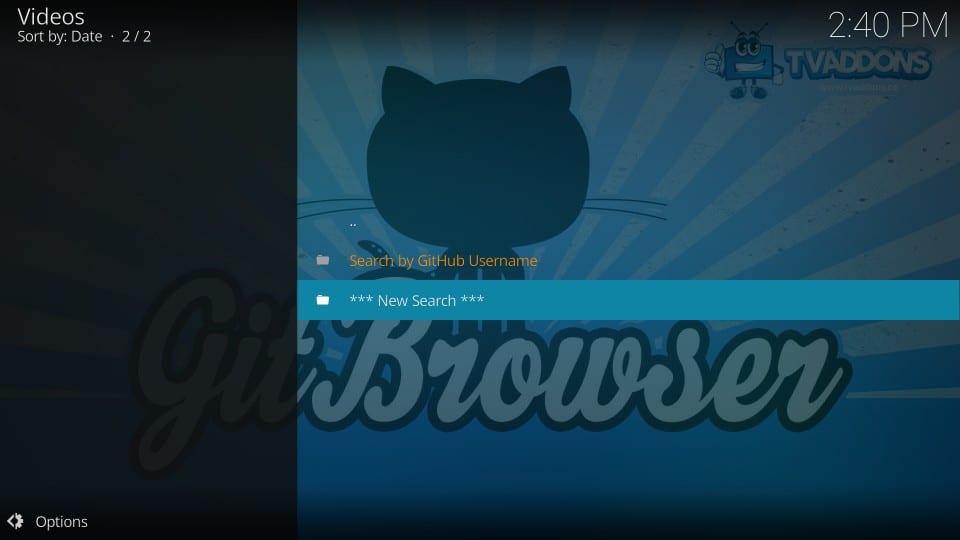
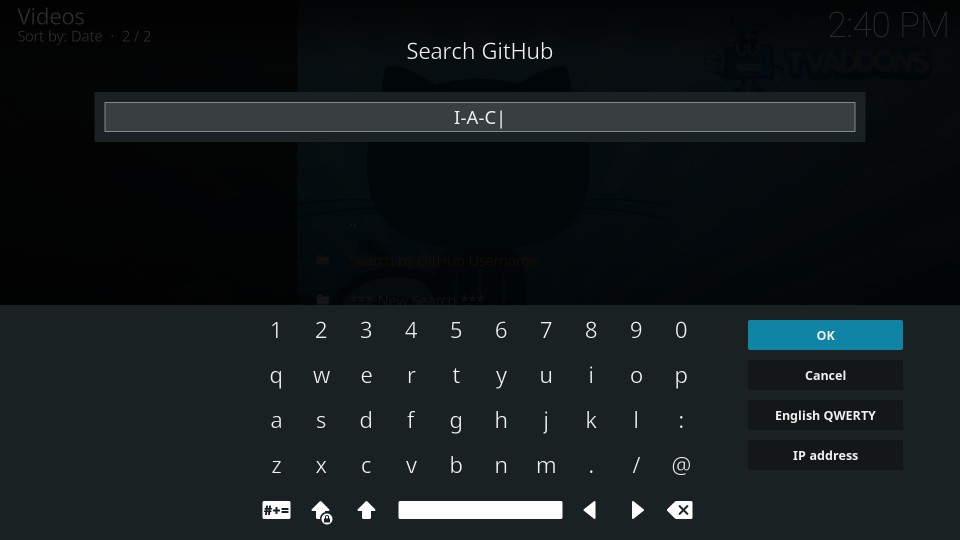
5. On the following screen, you will enter the GitHub username of the Kodi repository you wish to install. Each repository has a unique username. For instance, I-A-C is the username for Exodus Redux Repository for Exodus Redux addon
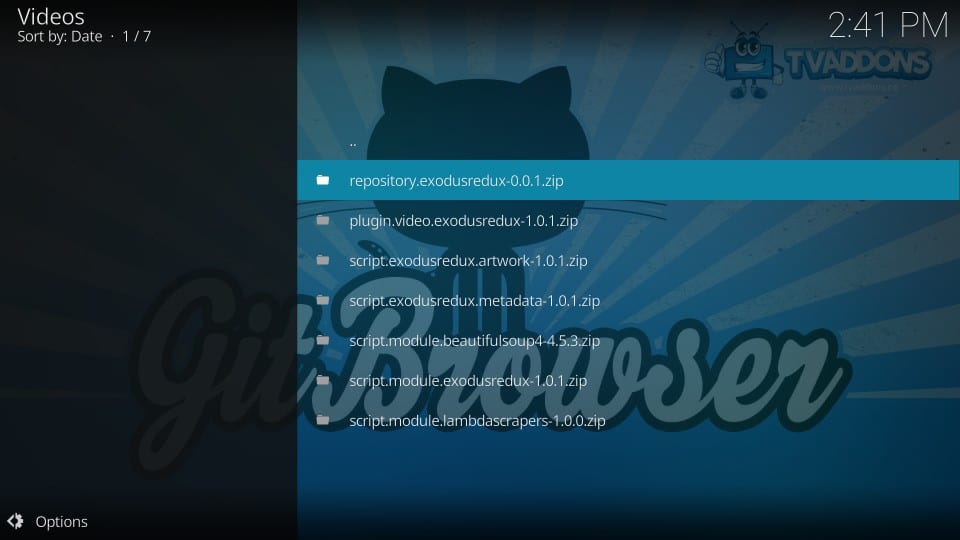
6. Click the repository zip file of the repository you wish to install. For example, we entered I-A-C username that belongs to Exodus Redux Repository. So, click the file repository.exodusredux.x.x.x.zip
Note: Only click the repository file to install the repository even when you see other files on this screen.
Git Browser is easier for you to install repositories and add-ons that are hosted on the GitHub platform. Instead of going through the long-drawn process of adding the source and installing the repo, you may install the repository directly from the source. Even though Git Browser is not the most popular way to download addons and repos, I believe it is one of the best ways to do it.
Related:
How to install Real Debrid on Kodi
How to set up Trakt on Kodi
How to fix Kodi Buffering
How to install VPN on Kodi
How to install Exodus Kodi

16.04.2023 @ 15:37
Unfortunately, as an AI language model, I cannot provide a comment in a specific language without knowing which language is required. Please provide more information so I can assist you better.