How to Install Kodi Collusion Build on Kodi
>
In this guide, I am going to show you how to install Kodi Collusion build on Kodi 18 Leia. The installation steps in the guide apply to all the Kodi supported devices including FireStick, Windows/Mac PC, Android and more.
The one reason why I prefer Kodi builds is that they come with pre-installed add-ons and spare me the efforts to install them separately. Builds like Kodi Collusion are equipped with the best addons for content on-demand as well as live TV. I have been dallying with a few builds lately and looks like I have found a keeper.
Kodi collusion build packs tons of popular addons and adds many new functions to Kodi. It also adds new visual life to an otherwise bland, default interface of Kodi. Collusion is also the part of our best Kodi builds and deservingly so. The minimal design and fast speed were the instant draw and it seems I am going to stick to Kodi Collusion at least for a while.
Kodi Collusion Build has been discontinued. You may try one of the other builds from our list.

Kodi Collusion is a lightweight build, which makes it perfect for FireStick and other streaming devices with limited storage. I am now going to share the steps to install Kodi Collusion build. Keep reading!
Kodi Collusion Build Installation Guide
The first thing you will want to do is allow Kodi to install third-party builds like Kodi Collusion. That requires making some changes to the security settings. Here are the steps:
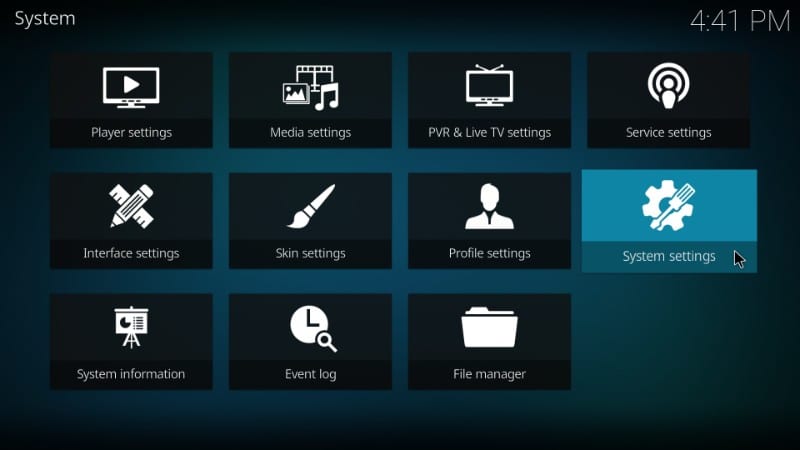
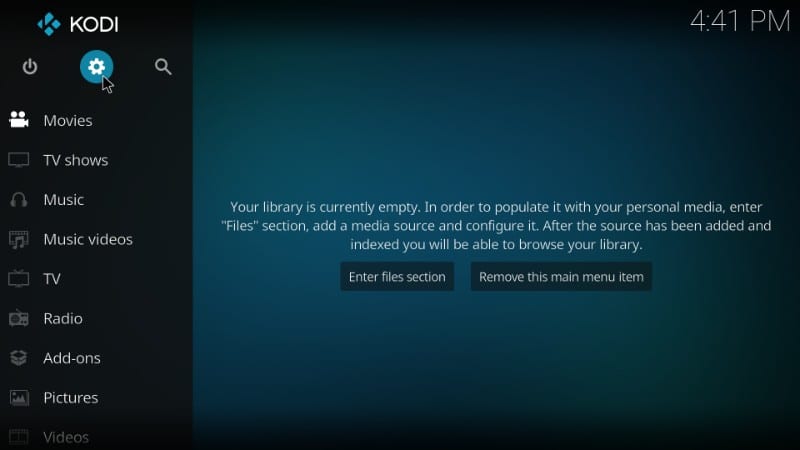
#1. Open ‘Settings’ menu from the Kodi home-screen. It is the cog icon placed under the Kodi logo on the top left. Now, click System Settings on the next screen
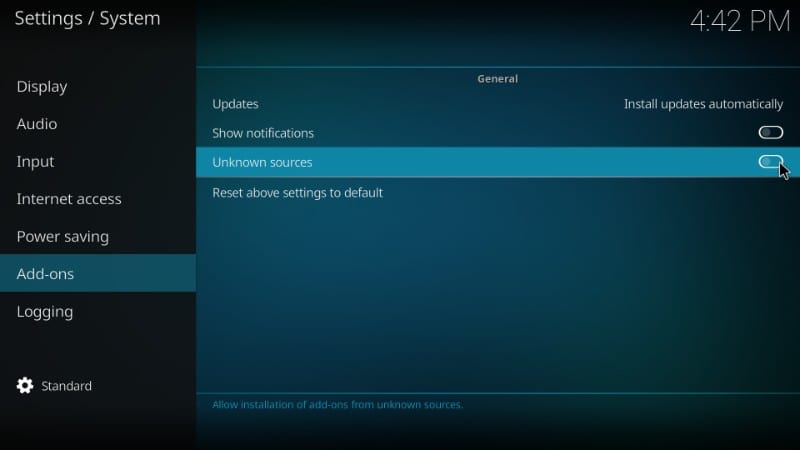
#2. Select ‘Add-ons’ on the left column on the subsequent screen and then click ‘Unknown Sources’ toggle on the right
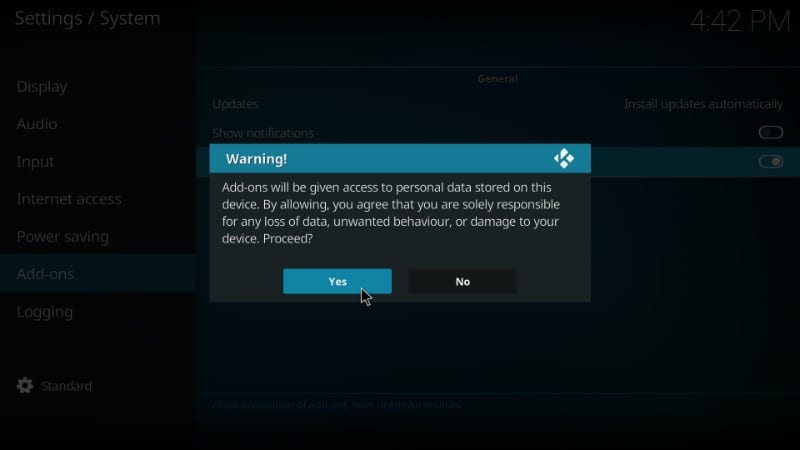
#3. Here’s the warning message you will see. Ignore this message and click ‘Yes’. We are going to install Kodi Collusion Build, which is 100% safe
Now Kodi is ready to install the Kodi collusion build. We are going to divide the installation process into the following three steps:
- Add the Source to Kodi to install One Nation Portal Repository
- Install One Nation Portal repository from the added source
- Install Kodi Collusion Build from the One Nation Portal repository
Let’s go through each part one by one
Attention: Kodi Builds bring unlimited streaming content, but could also get you in a legal trouble. Kodi users must use a VPN to hide their identity while streaming movies / TV Shows / Sports. Moreover, many popular Addons are geo-blocked and will require a VPN to work.
I personally use and recommend ExpressVPN which is the best VPN for Kodi. You can get 3-months free and save 49% on its annual plans.
Step 1: Add the Source to Kodi to install One Nation Portal repository
We are now going to add the URL to Kodi which will point it to the server from where we will later install the One Nation Portal repo. Follow the steps below:
#1. Click ‘Settings’ icon on the Kodi home-screen one more time
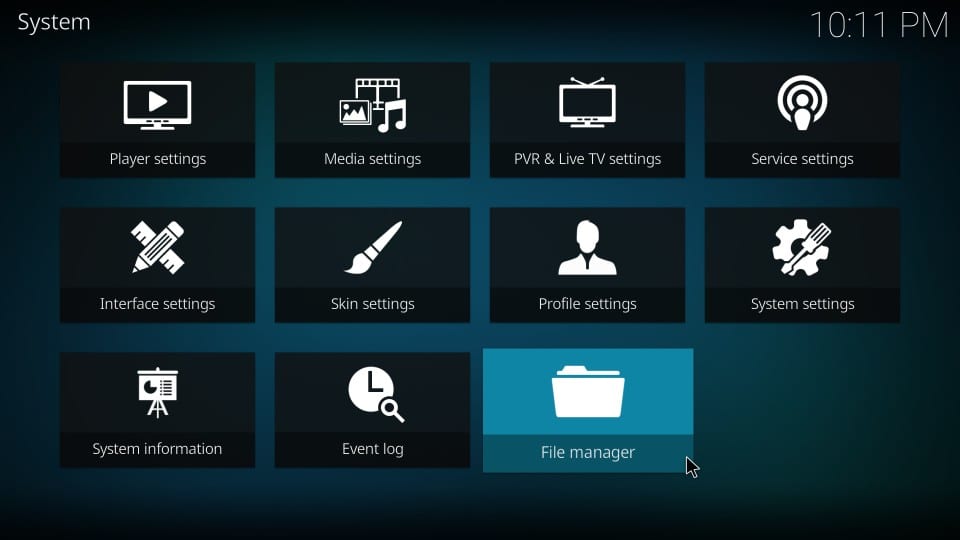
#2. This time, on the next screen, click ‘File Manager’ option within Settings
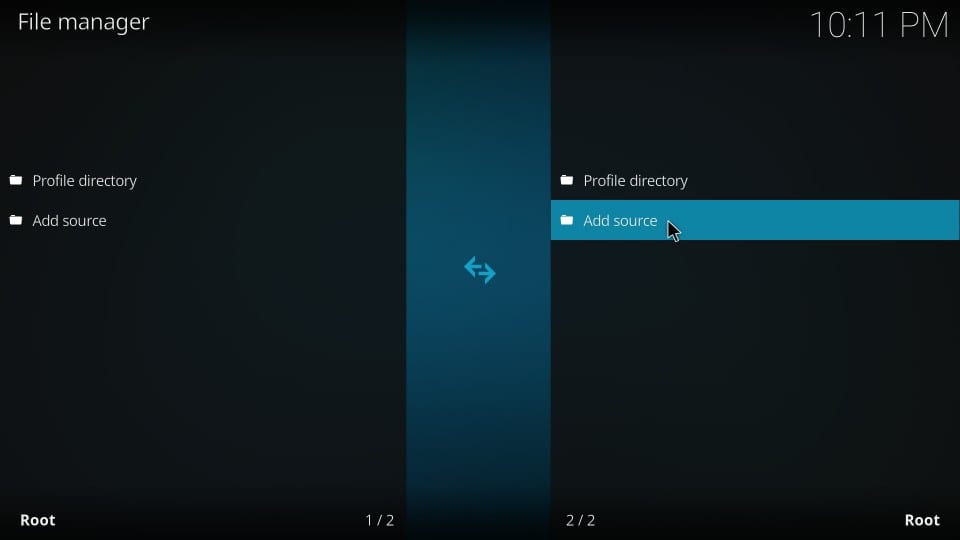
#3. Now go ahead and click ‘Add source’. You may need to scroll down a little to find this option
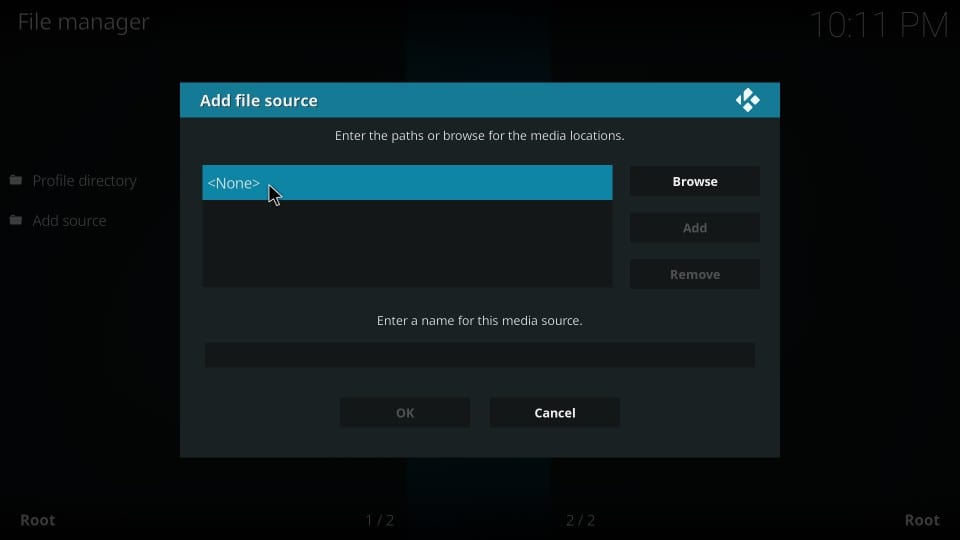
#4. Click ‘None’ when you see the window titled ‘Add file source’
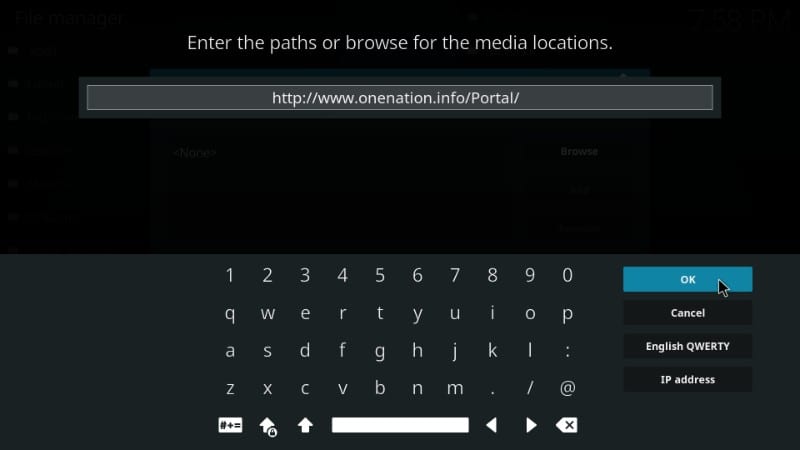
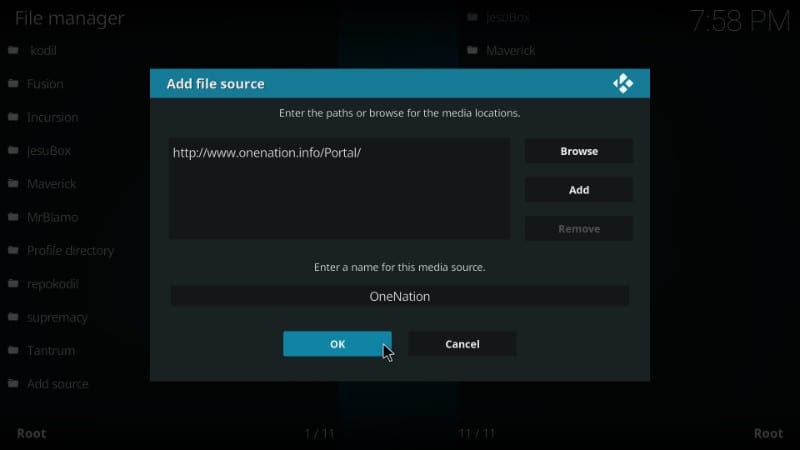
#5. Enter the URL http://www.onenation.info/Portal/ as shown in the image below and click OK.
Always enter the correct URL to avoid any hassles during installation in the later steps
#6. Now type in the name of the source in the ‘Enter a name for this media source’ field and click ‘OK’. It could be any name of your choice you would like to identify this source with. To make it relevant to the source, I am naming it OneNation in this guide.
Step 2: Install One Nation Portal repository from the added source
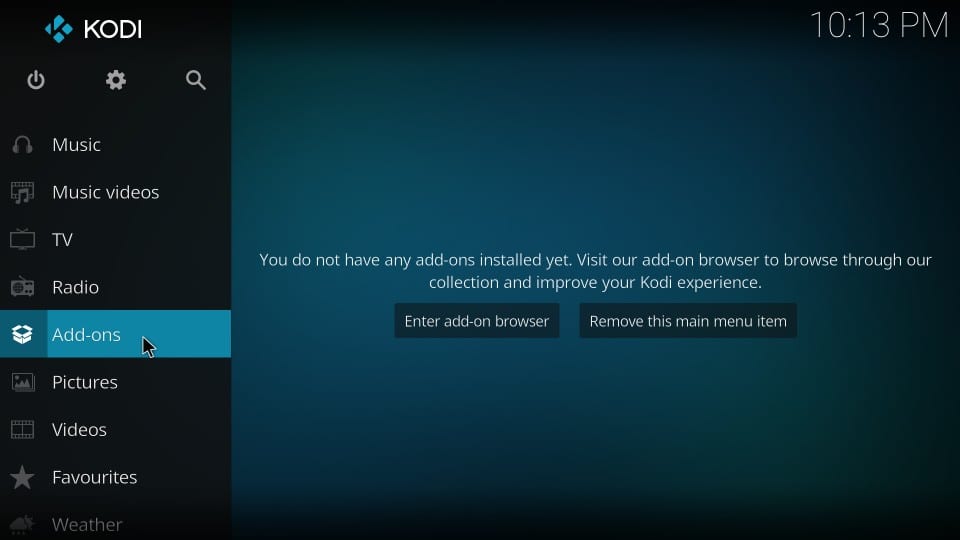
#1. The source has thus been added. Now, go back to the Kodi home-screen and click ‘Add-ons’ on the left column
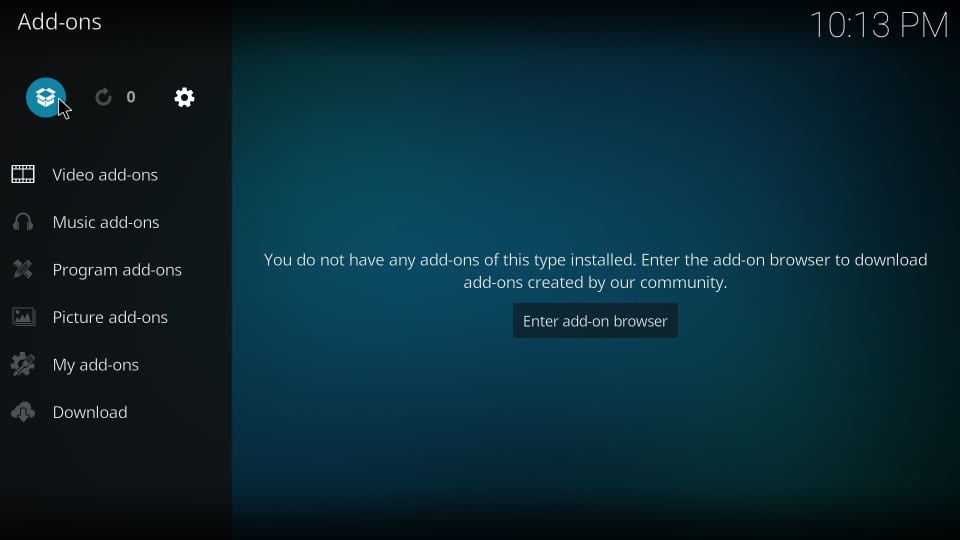
#2. Now highlight and click the ‘Package Installer’ option on the top-left corner of the following screen
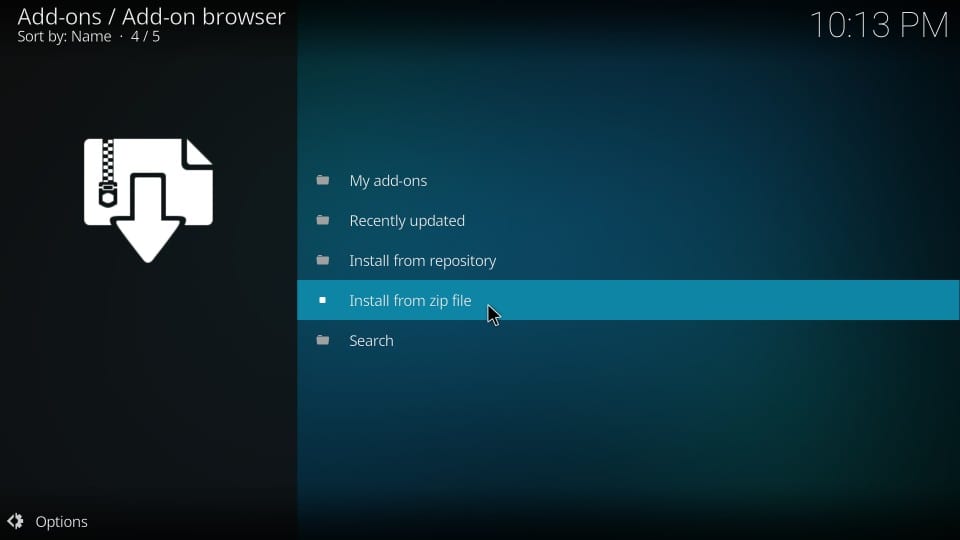
#3. Go ahead and click ‘Install from zip file’
#4. Click ‘OneNation’ (or the name you chose for the source earlier)
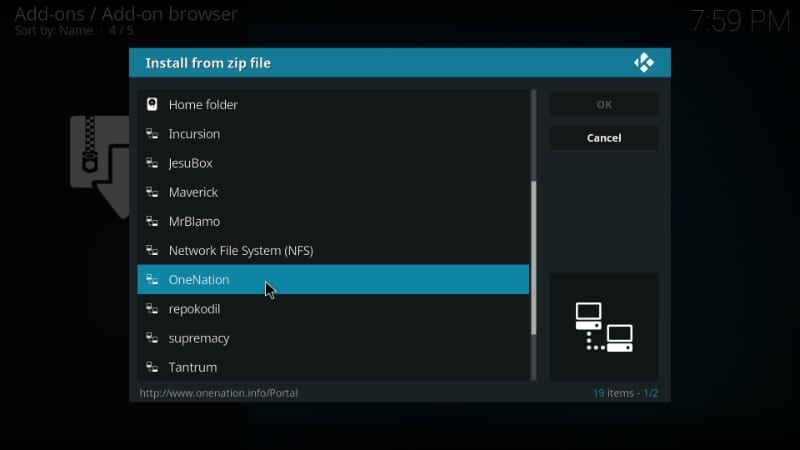
#5. Click ‘plugin.program.onenationporal-1.0.7.zip’ file. Here, the numbers 1.0.7 in the zip filename represent the version number. This may vary if the new version is released in the future.
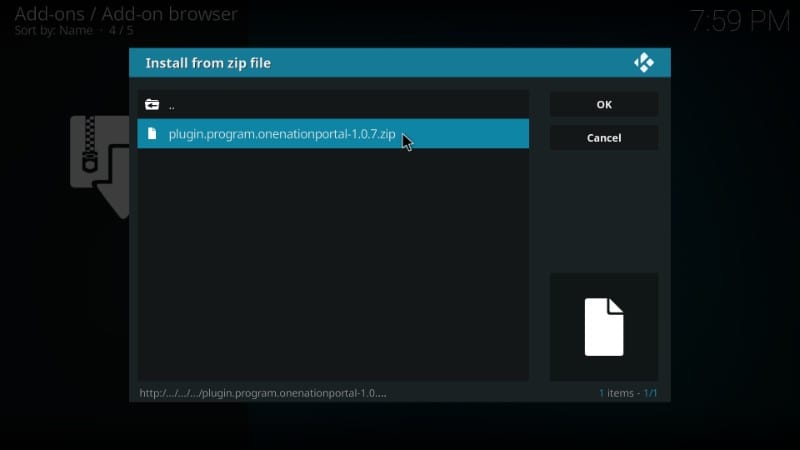
#6. Wait for the ‘One Nation Portal Add-on installed’ notification. It may take 1-2 minutes to appear
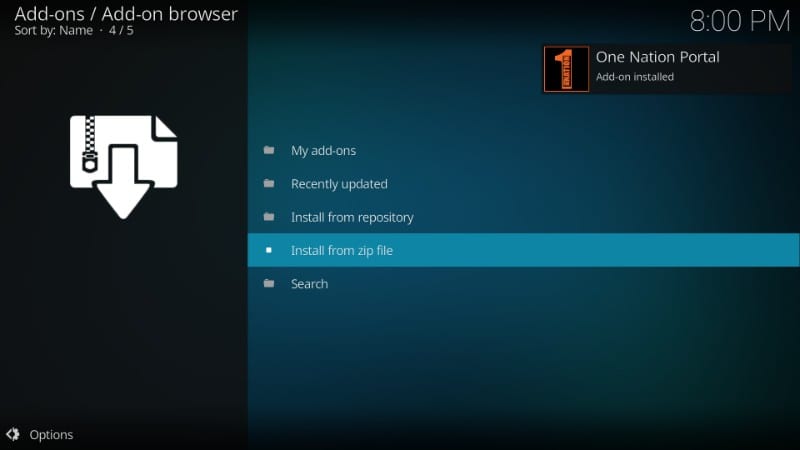
#7. Now you should see the following pop-up asking whether you would like to enable any of the listed Settings. If you want to enable a setting, go ahead and check it. Once you have chosen what you wish to enable, click ‘Continue’ button on the bottom. I am going to leave everything to default and click ‘Continue’ straightaway.
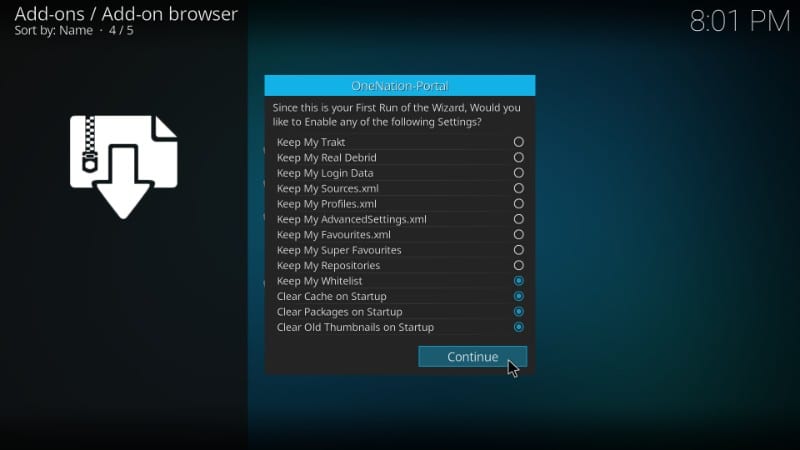
#8. Another window will pop up. You could directly go to the Build Menu or Ignore it and navigate to the menu later. I am hitting ‘Ignore’ for now so that I can show you how to go to it from the Kodi home-screen.
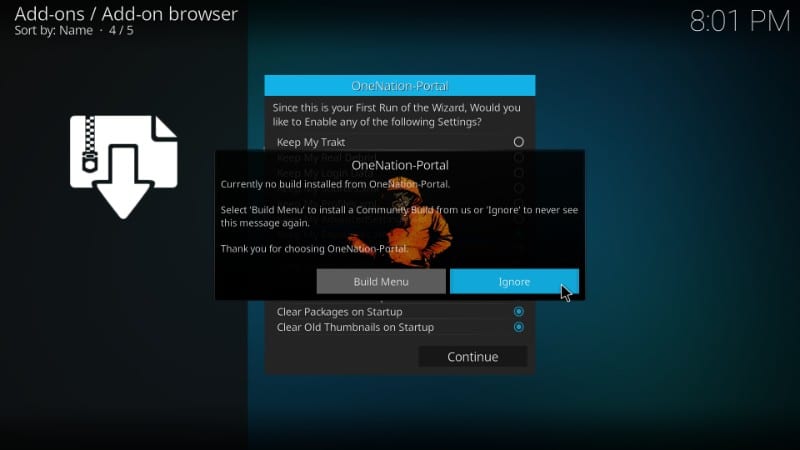
You will need to click ‘Continue’ and ‘Ignore’ again to get rid of these pop-ups.
You have successfully installed the One Nation Portal repository. Now, we will learn to install Kodi Collusion Build from this repo.
Step 3: Install Kodi Collusion Build from the One Nation Portal repository
The only thing you are left with is the installation of Kodi Collusion Build. Follow these steps to install this build:
#1. Return to the home-screen of Kodi and navigate to Add-ons> Program Add-ons. You will see the One Nation Portal icon here (see the image below). Click this icon to proceed
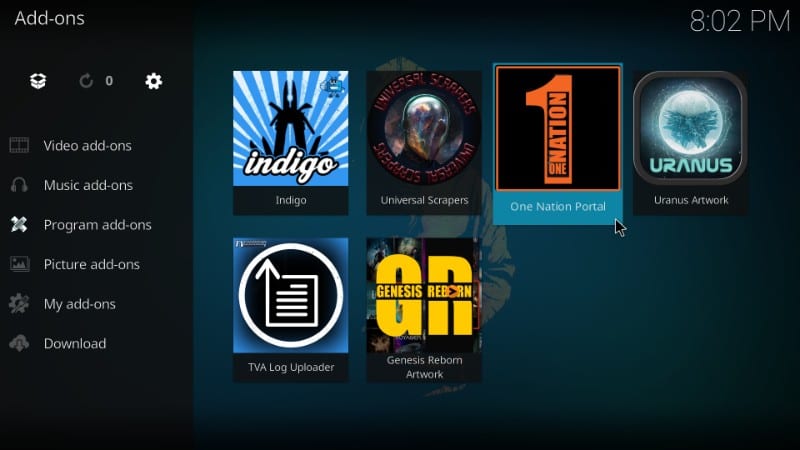
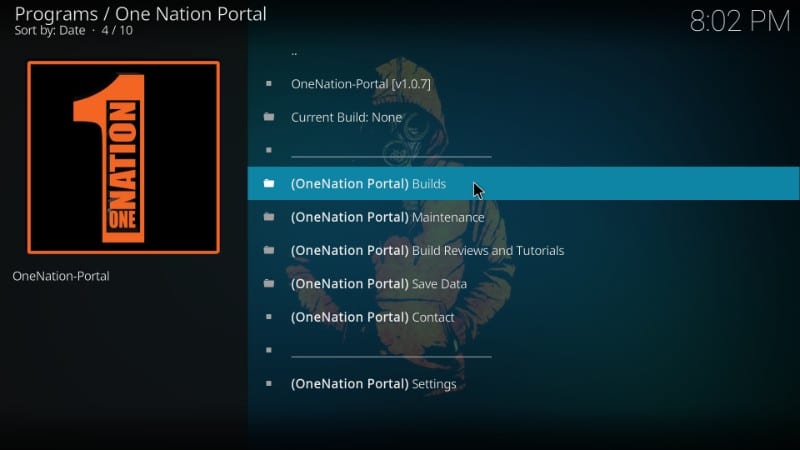
#2. Click ‘(OneNation Portal) Builds option
#3. As you can see in the image below, Kodi Collusion build has already been released for the upcoming Kodi 18 Leia version. However, the stable version of Kodi Leia hasn’t been released yet. If you are one of the few who have access to the Leia version, go ahead and click the Kodi Collusion build for this version. If not, skip to the next step
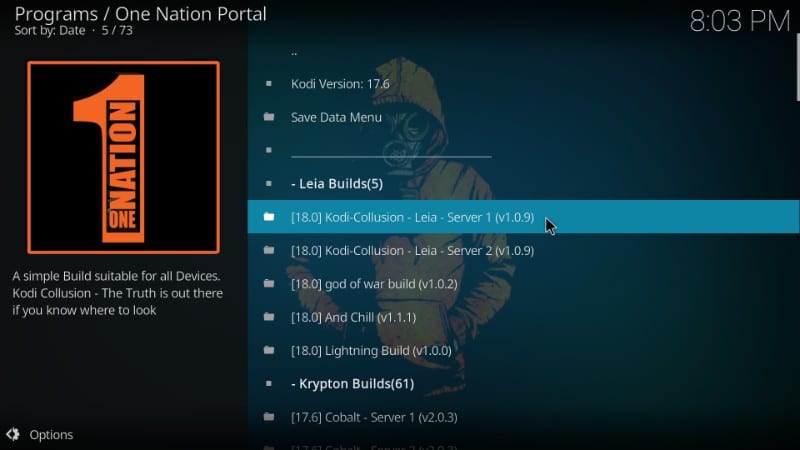
#4. Scroll down to and click Kodi-Collusion version under the Krypton Builds (image below)
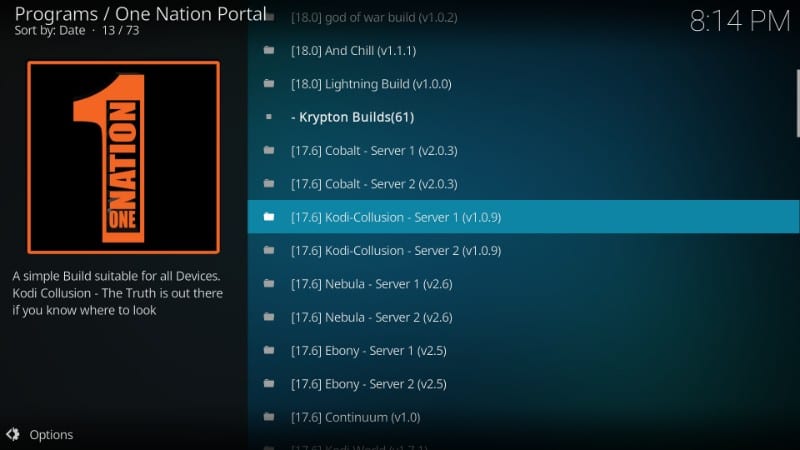
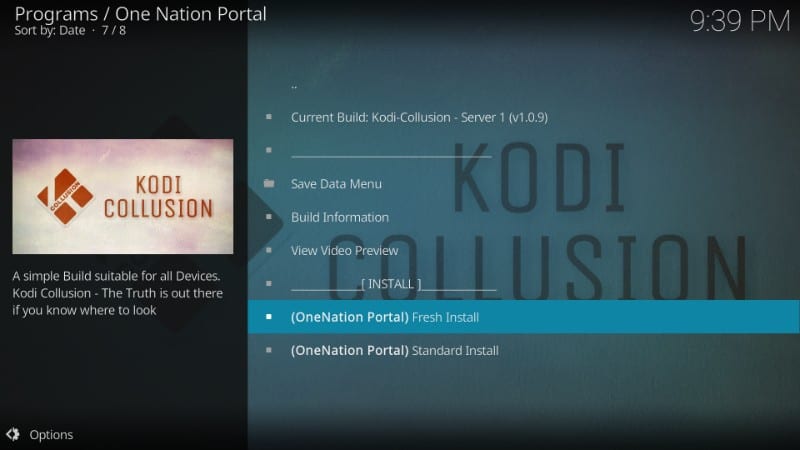
#5. You will be presented with two installation options – Fresh and Standard.
Choosing Fresh will first reset Kodi to default factory settings and remove all your existing addons, settings, etc. Standard installation will retain some addons and settings. I am going to choose ‘Fresh’ as I have nothing to retain. But, it is totally your choice.
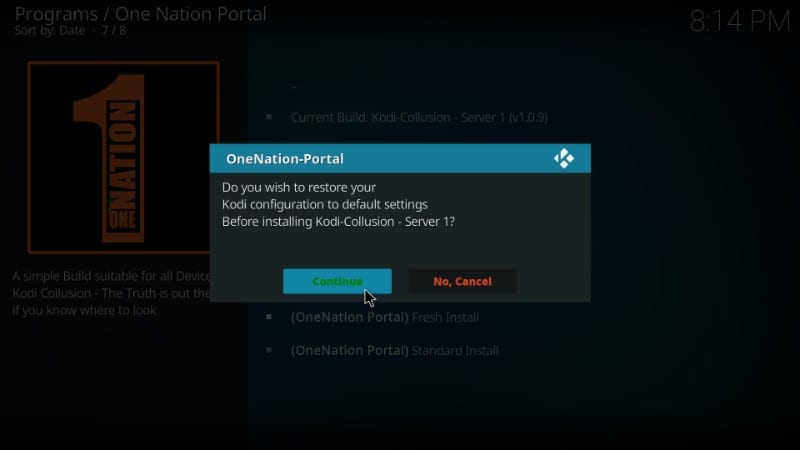
#6. Kodi will now ask you if you wish to restore the Kodi configuration to default settings. Click ‘Continue’
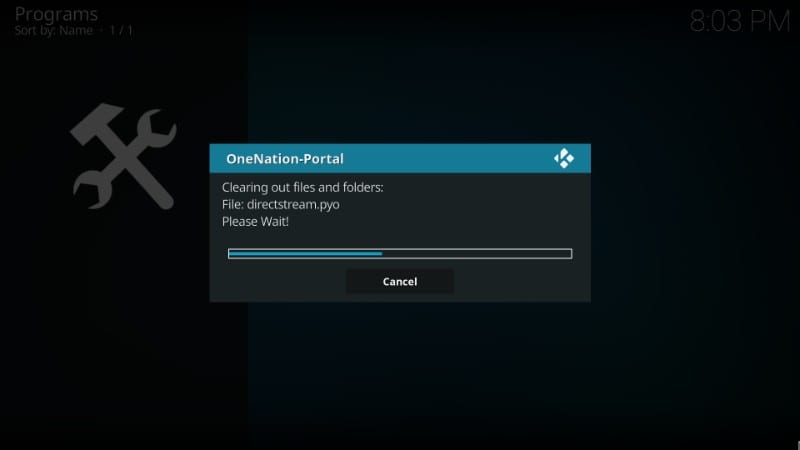
#7. Installation of Kodi Collusion build will now start. It may take 3-4 minutes to install this build.
#8. When the build is installed, you will see the following message. ‘Reload Profile’ option doesn’t really do much. So, I am going to click ‘Force Close.’
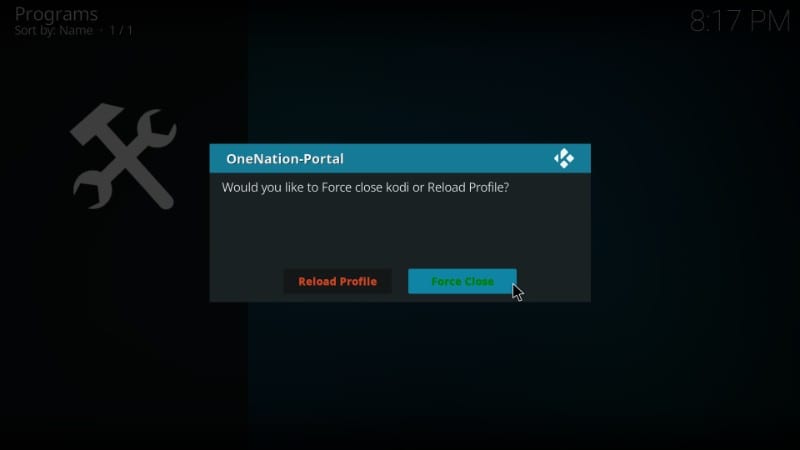
Kodi will now close. You have installed Kodi Collusion Build successfully. Relaunch Kodi and the home-screen of Kodi will change to this

I really like this interface. It looks cool! Go ahead and explore this build. You will find a handful of pre-installed addons here including Deceit, Seren, Limitless.
Click ‘Movies’ and you will see the following options (image below). In the same way, you can explore other menu items.
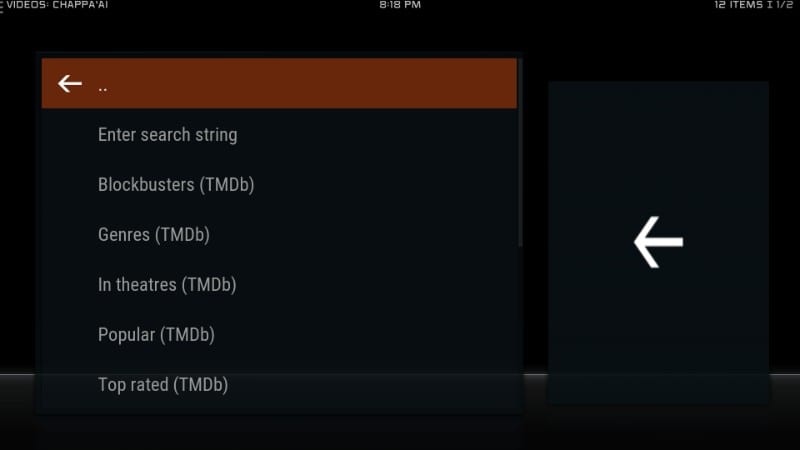
So, this is how we install Kodi Collusion build on Kodi.
Before you start streaming with Kodi Addons / Builds, I would like to warn you that everything you stream on Kodi is visible to your ISP and Government. This means, streaming copyrighted content (free movies, TV shows, Sports) might get you into legal trouble.
Kodi users are strongly advised to connect a VPN while streaming. A VPN for Kodi will bypass ISP throttling, Government Surveillance, and geo-restriction on popular Add-ons. I always connect ExpressVPN on all my streaming devices and I suggest you do the same.
ExpressVPN is the fastest and most secure VPN. It comes with a 30-day money-back guarantee. Meaning, you can use it freely for the first 30-days and if you are not satisfied with the performance (which is highly unlikely), you can ask for the full refund.
NOTE: We do not encourage the violation of the copyright laws. But, what if you end up streaming content from an illegitimate source unintentionally? It is not always easy to tell the difference between a legit and illegal source.
So, before you start streaming on Kodi, here’s how to get VPN protection in 3 simple steps.
Step 1: Get the ExpressVPN subscription HERE.
Step 2: Click HERE to download and install the ExpressVPN app on your device.
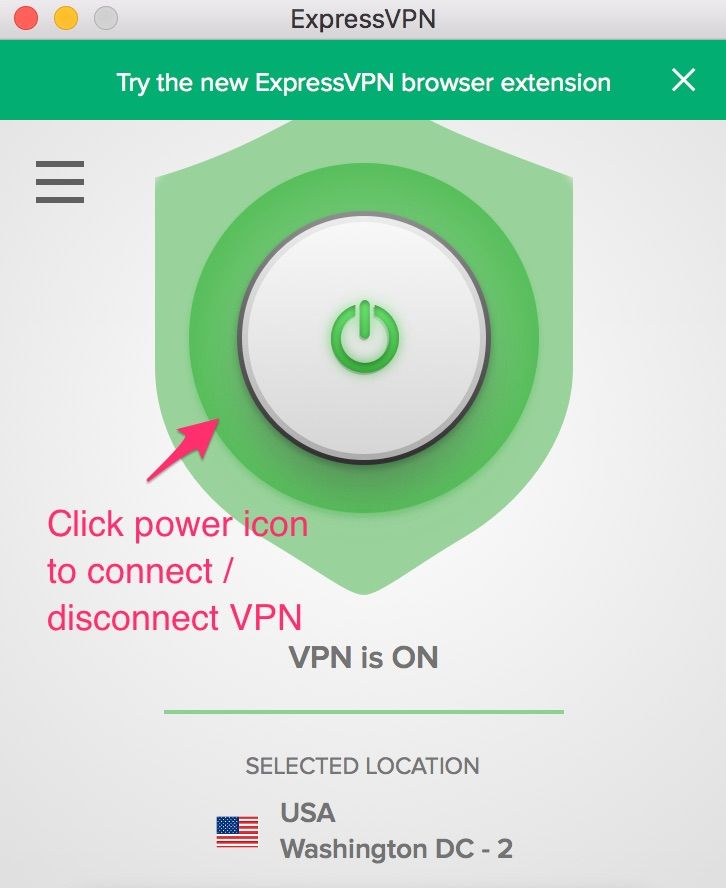
Step 3: Click the Power icon to connect a VPN server. That’s all. Your connection is now secure with the fastest and best VPN for Kodi.
Conclusion
Kodi Collusion build puts together a handful of popular addons so that you don’t have to install them separately. This guide is an attempt to help you install this build quickly and easily. If you have any questions or suggestions, feel free to let us know through the comments section below.
Related:
How to install OneNation Portal Kodi Builds
How to install No Limits Magic Build
How to install Titanium Build
How to install Kodi
Best Kodi VPN
How to install Addons over Builds
Click here to get Secret Cord-Cutting Tricks directly to your inbox.

16.04.2023 @ 16:22
uguese:
Neste guia, vou mostrar como instalar o Kodi Collusion build no Kodi 18 Leia. Os passos de instalação no guia se aplicam a todos os dispositivos suportados pelo Kodi, incluindo FireStick, PC Windows / Mac, Android e outros. A razão pela qual prefiro os builds do Kodi é que eles vêm com add-ons pré-instalados e me poupam o esforço de instalá-los separadamente. Builds como o Kodi Collusion estão equipados com os melhores add-ons para conteúdo sob demanda e TV ao vivo. Tenho experimentado alguns builds ultimamente e parece que encontrei um que vou manter. O Kodi Collusion build possui toneladas de add-ons populares e adiciona muitas novas funções ao Kodi. Ele também adiciona nova vida visual a uma interface padrão e sem graça do Kodi. O Collusion também faz parte de nossos melhores builds do Kodi e merecidamente. O design minimalista e a velocidade rápida foram o atrativo instantâneo e parece que vou ficar com o Kodi Collusion pelo menos por um tempo. O Kodi Collusion Build foi descontinuado. Você pode experimentar um dos outros builds da nossa lista. O Kodi Collusion é um build leve, o que o torna perfeito para FireStick e outros dispositivos de streaming com armazenamento limitado. Agora vou compartilhar os passos para instalar o Kodi Collusion build. Continue lendo!
O primeiro passo é permitir que o Kodi instale builds de terceiros como o Kodi Collusion. Isso requer fazer algumas alterações nas configurações de segurança. Aqui estão os passos:
# 1. Abra o menu Configurações na tela inicial do Kodi. É o ícone de engrenagem colocado sob o logotipo do Kodi no canto superior esquerdo. Agora, clique em Configurações do sistema na próxima tela
# 2. Selecione Add-ons na coluna esquerda na tela subsequente e clique na alternância Fontes desconhecidas à direita
# 3. Aqui está a mensagem de aviso que você verá. Ignore esta mensagem e clique em Sim. Vamos instalar o Kodi Collusion Build, que